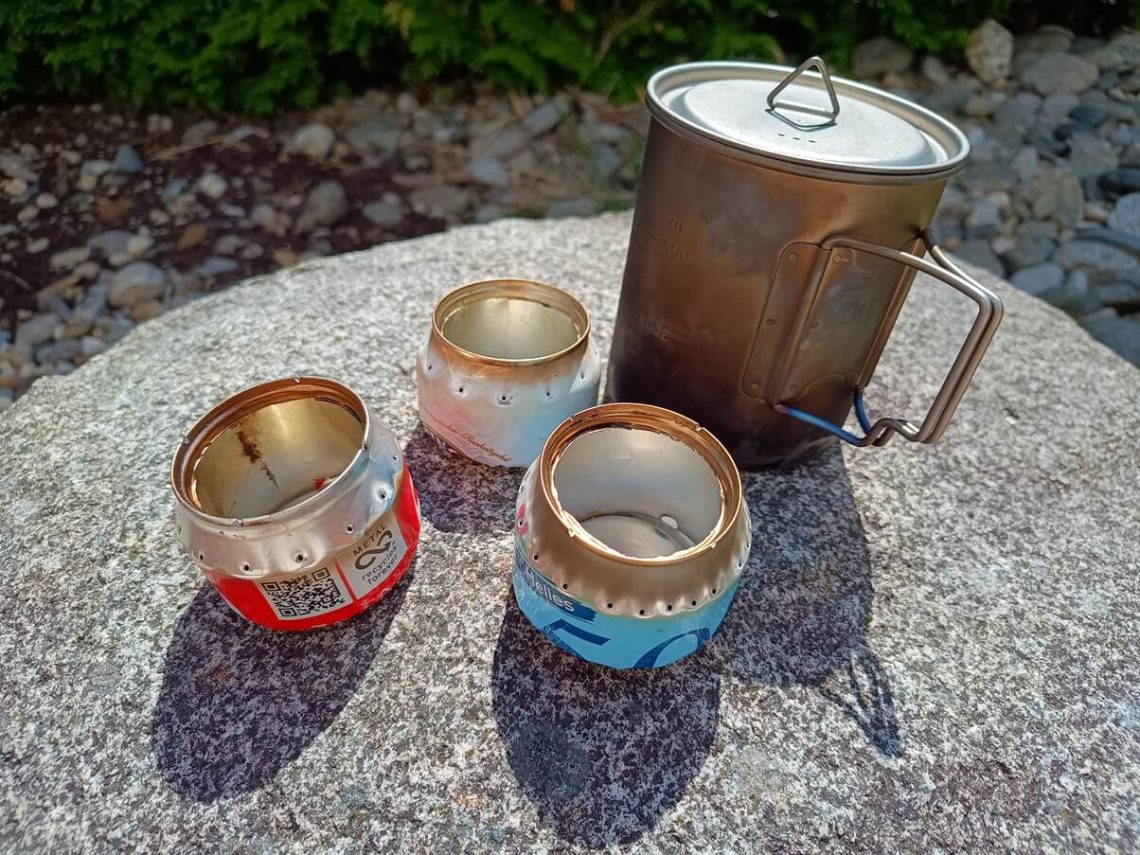
Beer Can Alcohol Stove | Open Jet
One stove that I wanted to make and try out for a long time is a DIY open Jet Alcohol Stove made from a single beer can. After many attempts and trial and error, I have found one that is relatively foolproof to make.
Design and build
This design is not my original idea, and is done a thousand times on the internet. I have picked up a few pointers however that I have not seen before. And I think makes this stove a lot easier to build and use.
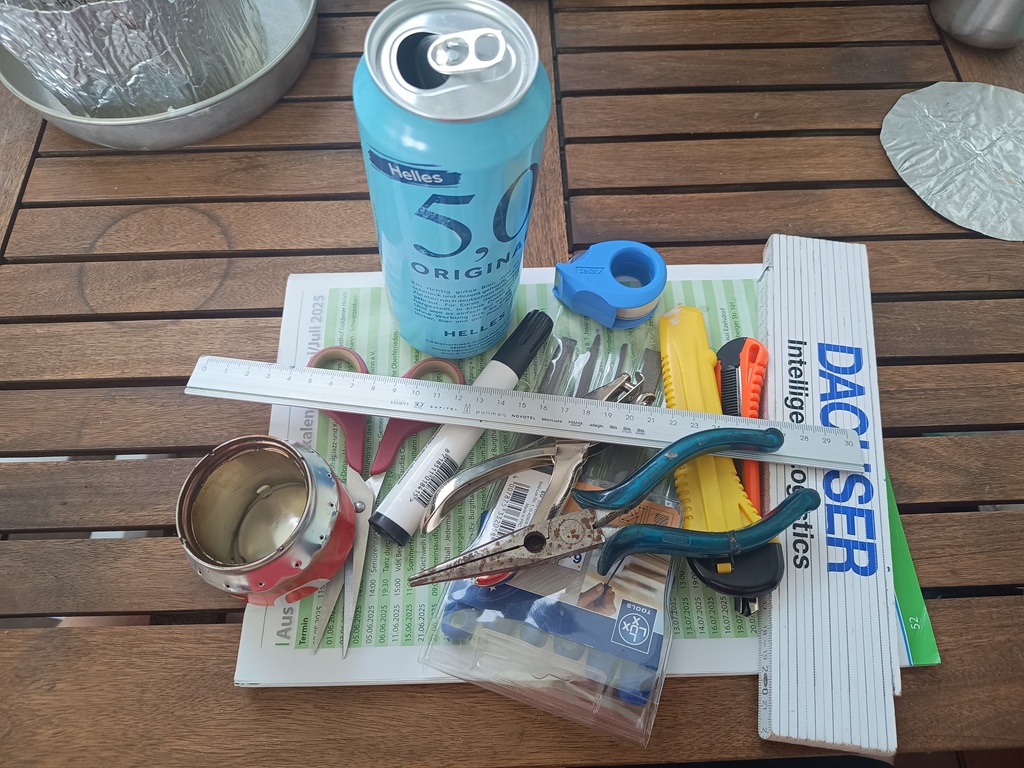
What you need to replicate my specific design are the following tools and materials:
- Needle nosed pliers
- Hole punch
- Push pin
- Scissors
- Stanley knife
- Ruler
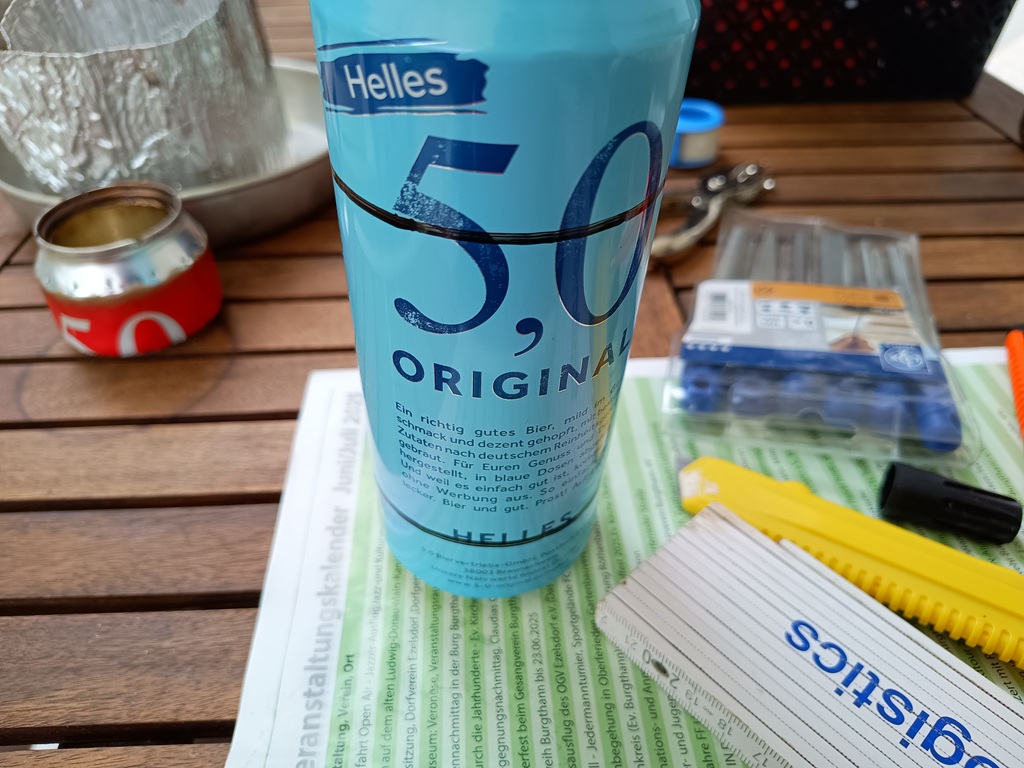
- Beer can (half liter)
- Standard tape
- v shaped file
As always, be careful with sharp edges and tools. And your playing with fire. So take care and precautions!
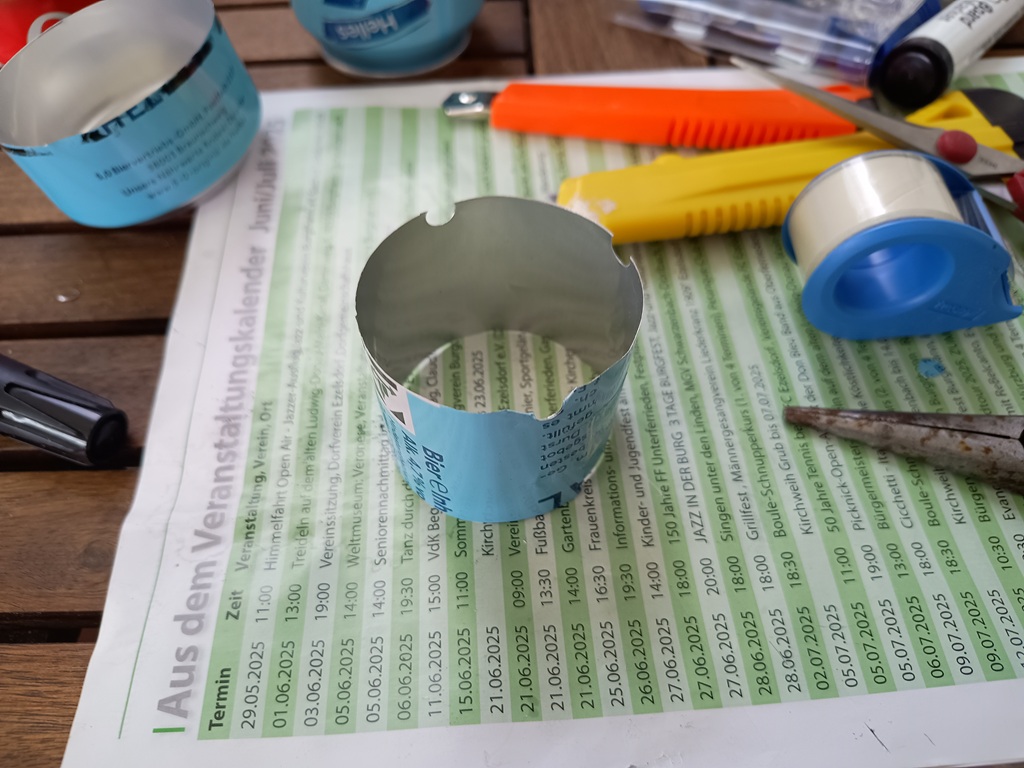
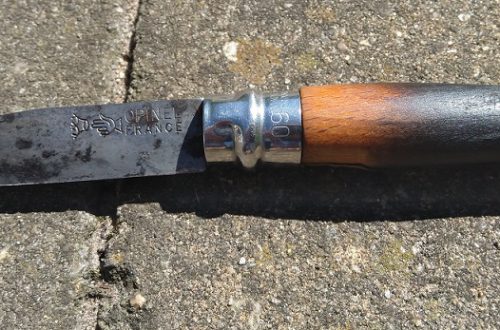
Step 1. Get yourself an empty beer or soda can, in a half a liter can.
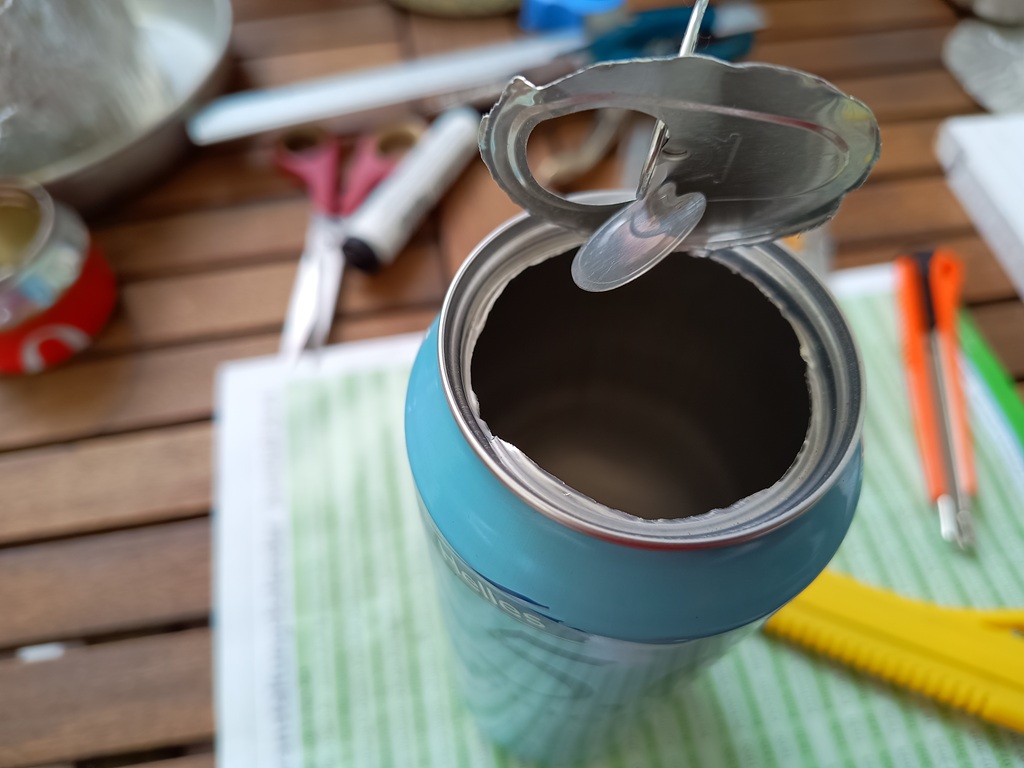
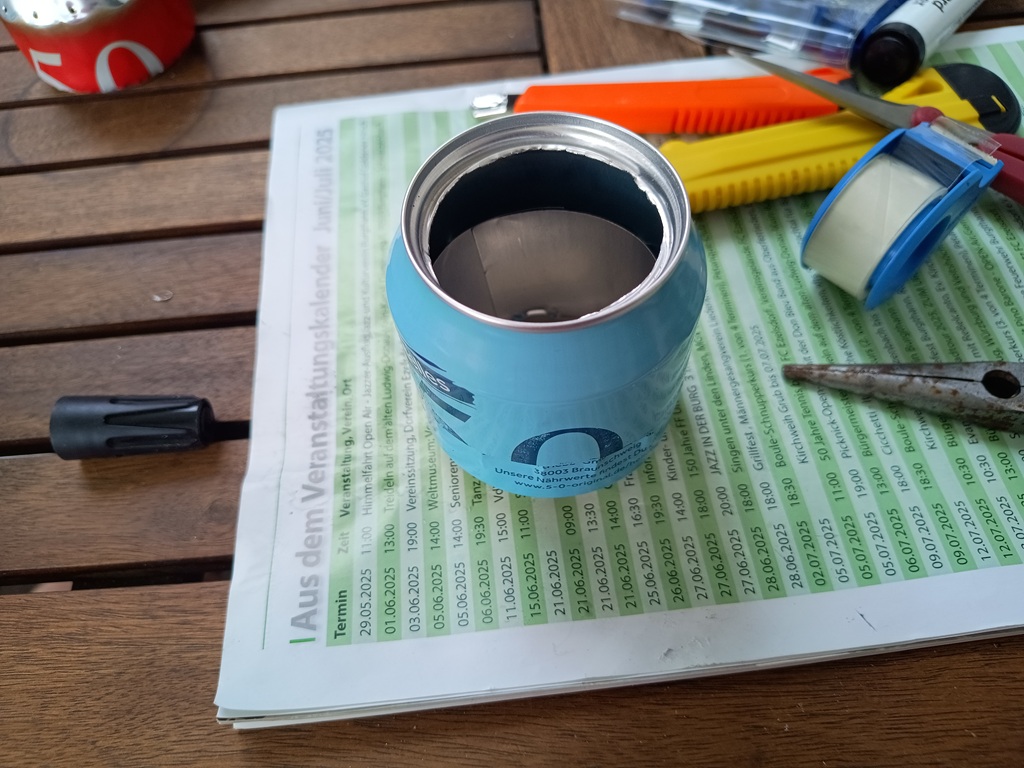
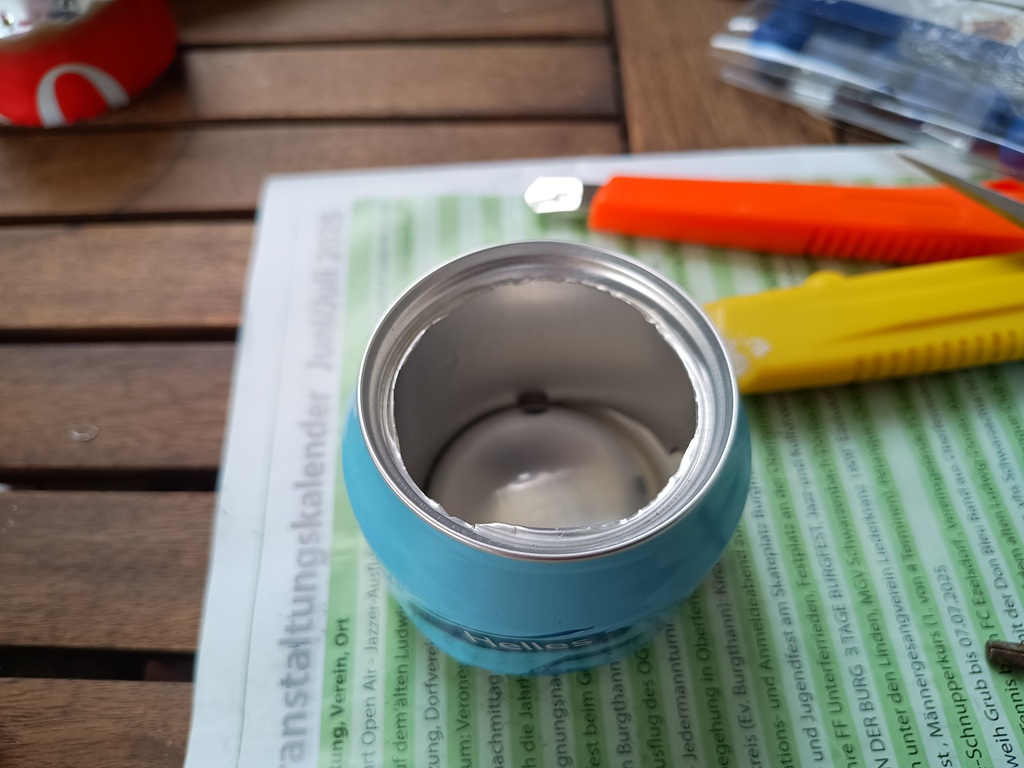
Step 2. Cut the top off the can, which you can do quick and dirty with a Stanley knife. A file, or safety can opener. My particular safety can opener does not work so well, and dents the can all around. Yours can differ.
Step 3. Measure and mark 3 CM from the bottom, and 4 CM from the top and draw a line all around the can.
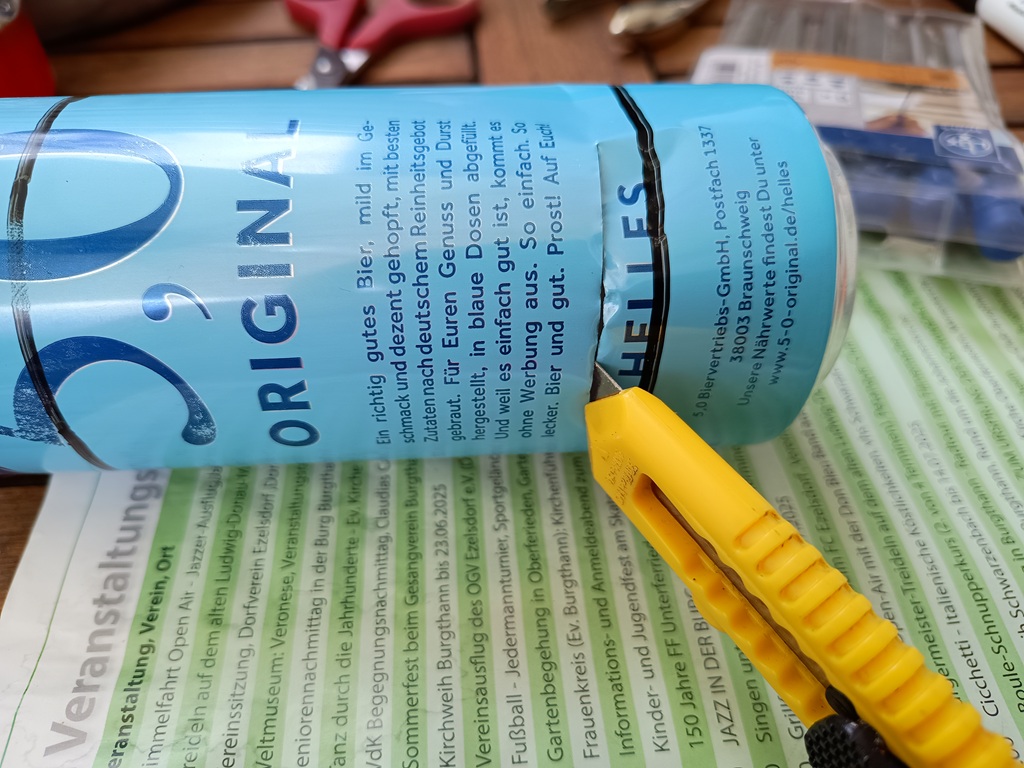
Step 4. Cut the lines neatly, or do as I do and rough cut with the Stanley knife a bit over the mark, and fine cut with the scissors.
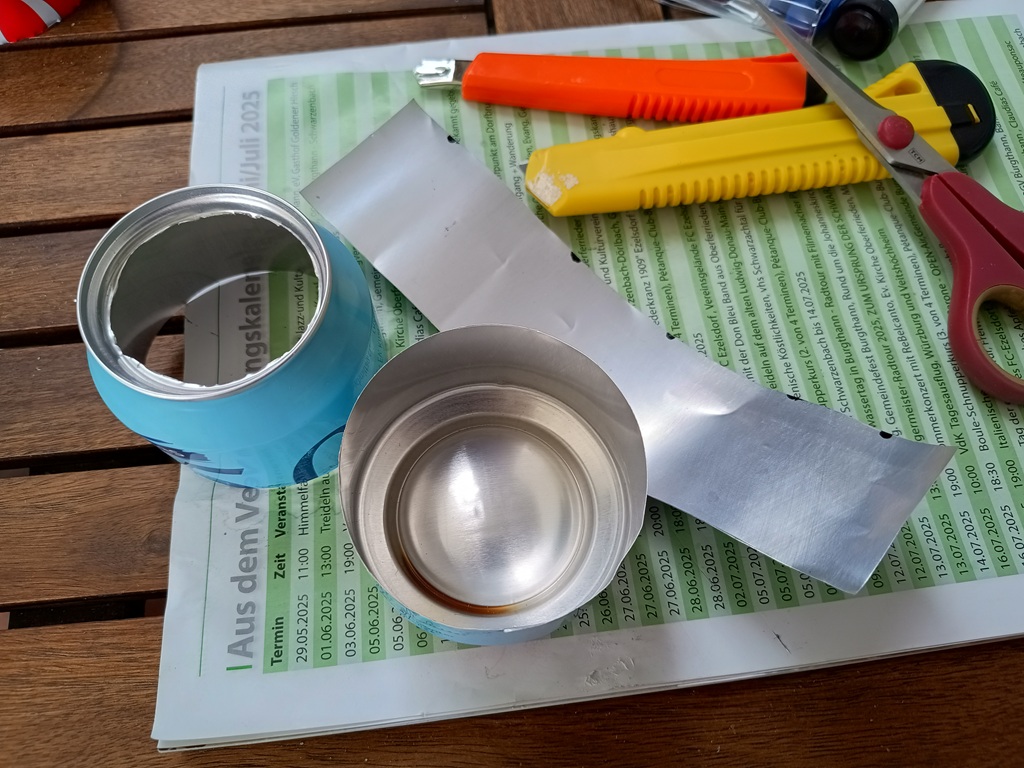
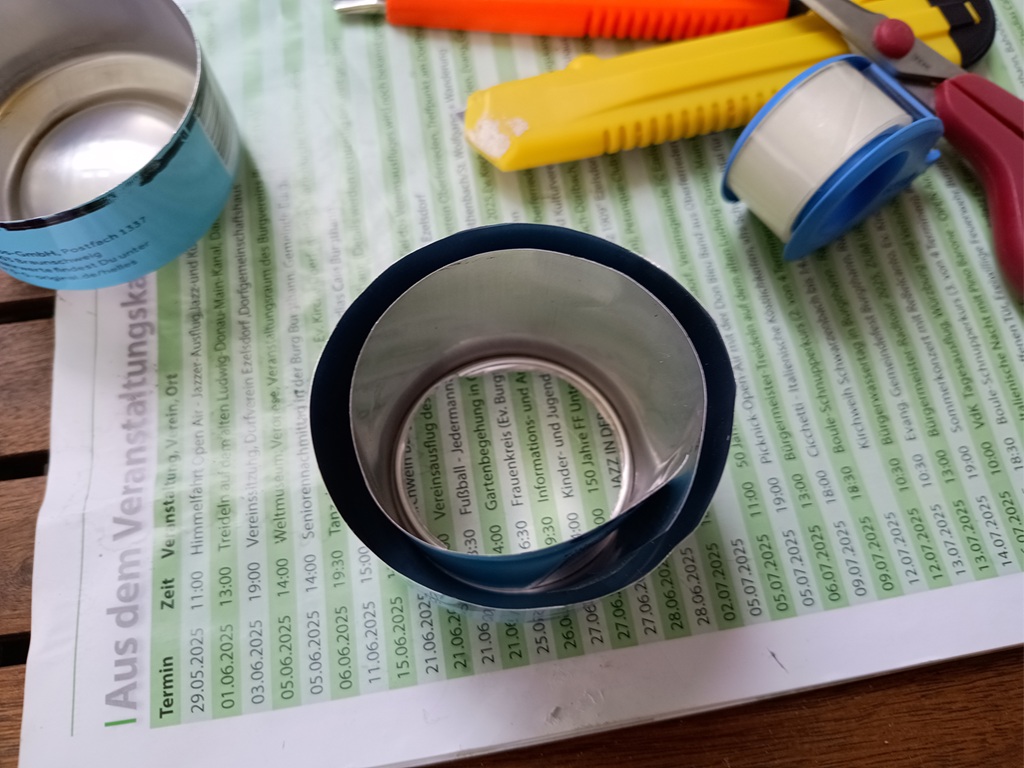
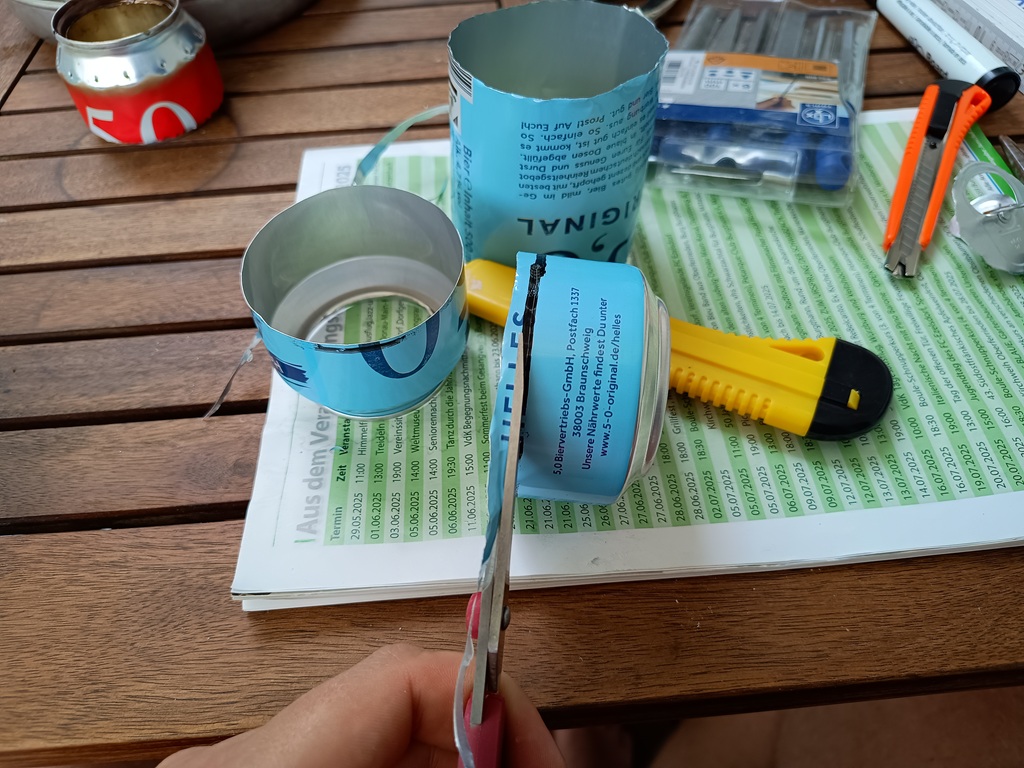
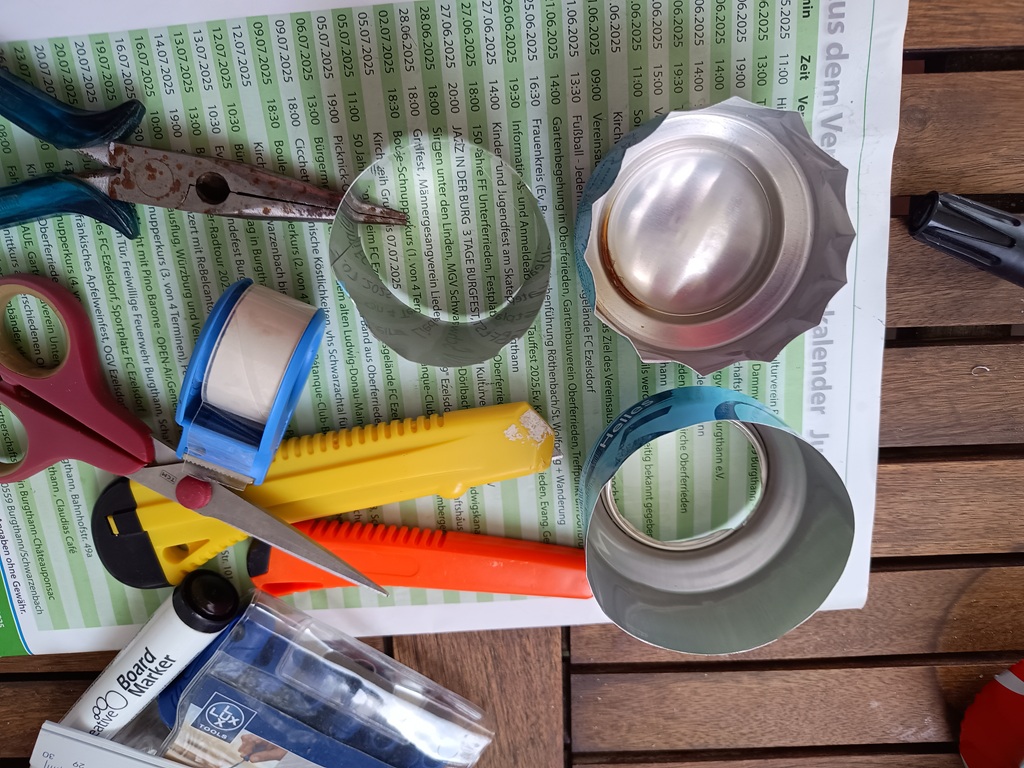
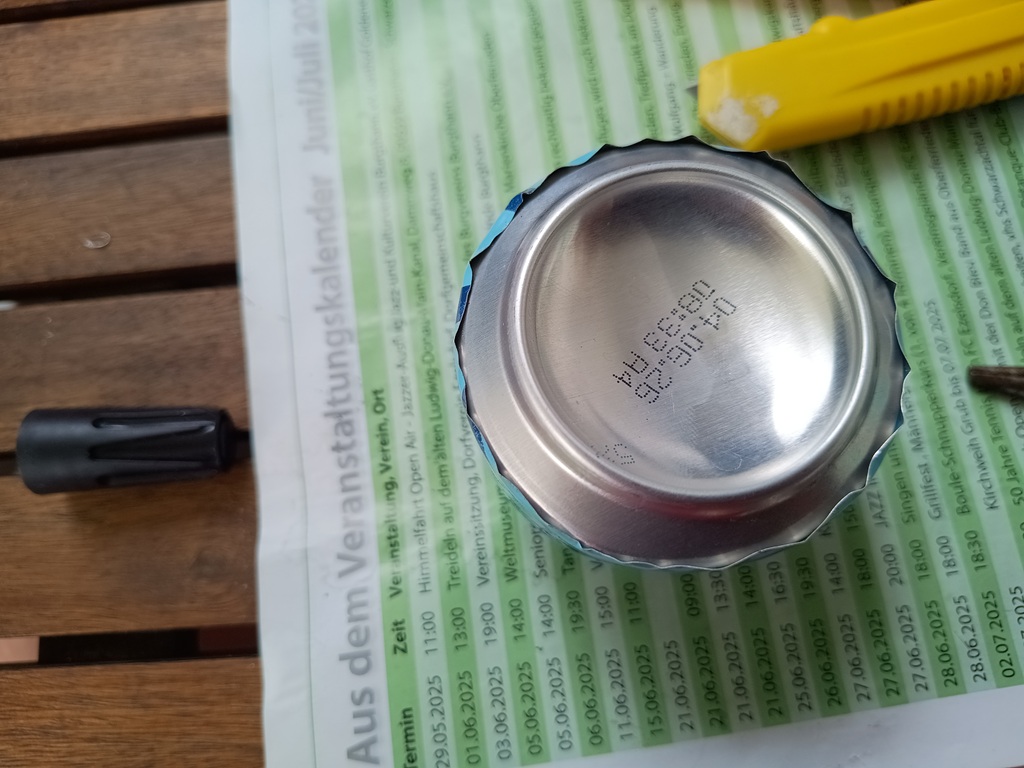
Step 5. Make the center part by cleaning up the leftover inner part. Make one straight edge, measure 4 CM and cut with the Stanley knife next to your ruler. Measure inside the can until a nice fit, and cut off about 1 CM off both ends to make the overlap a bit shorter. Until it measures 17.5 cm in length and 4 cm wide. Stick with a piece of tape to hold. Or if you have a stapler you can use that as well.
Step 6. With the hole punch make 4 open holes on the bottom of the inner. With one on the edge of the overlap. Bend over the end pieces of that part to further hold the shape together. Remove or keep the piece of tape, depending on how well it keeps together. Once inside the stove, it will burn off, and hold together due to the fit.
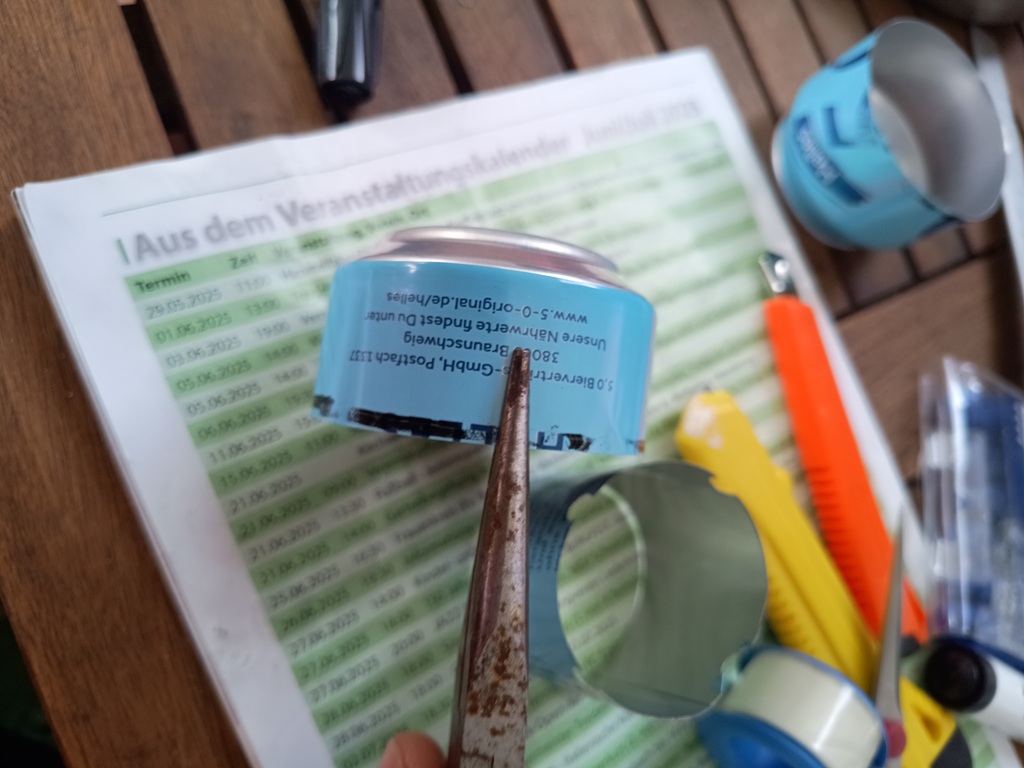
Step 7. Crimp the bottom can with the Needle nosed pliers all around. Else fitting the pieces together is a nightmare.
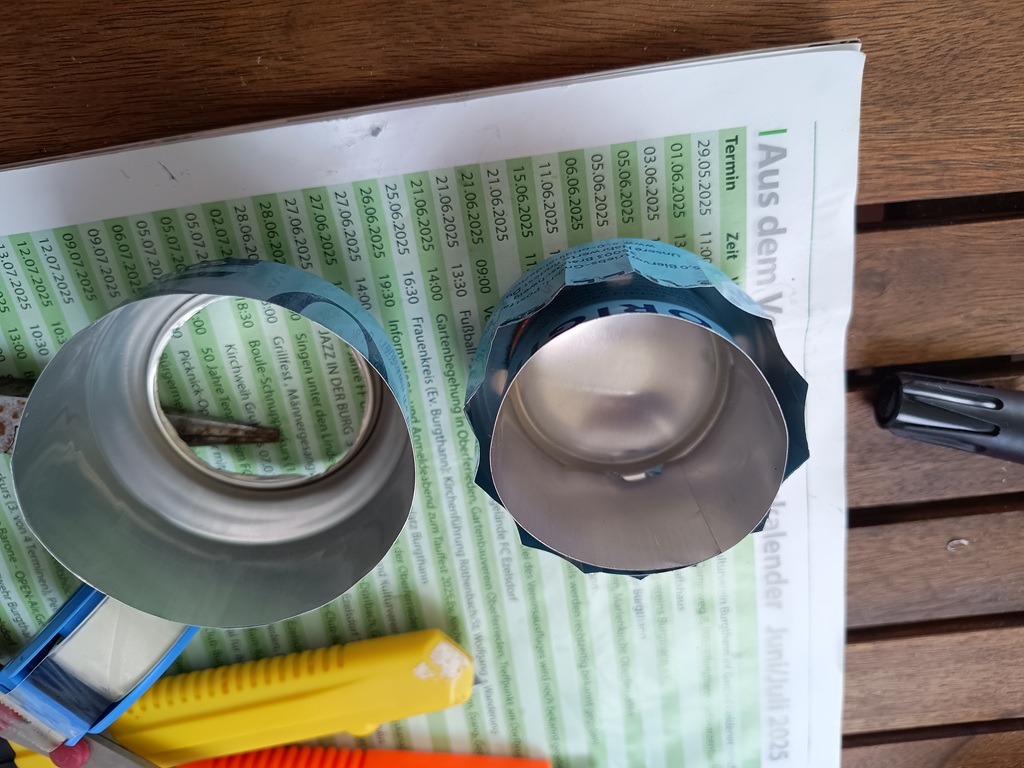
Step 8. Assemble the three pieces. Go slow, and use a piece of wood to apply equal pressure. Guide the inner wall as needed into place. Fold over the bottom lip as needed.
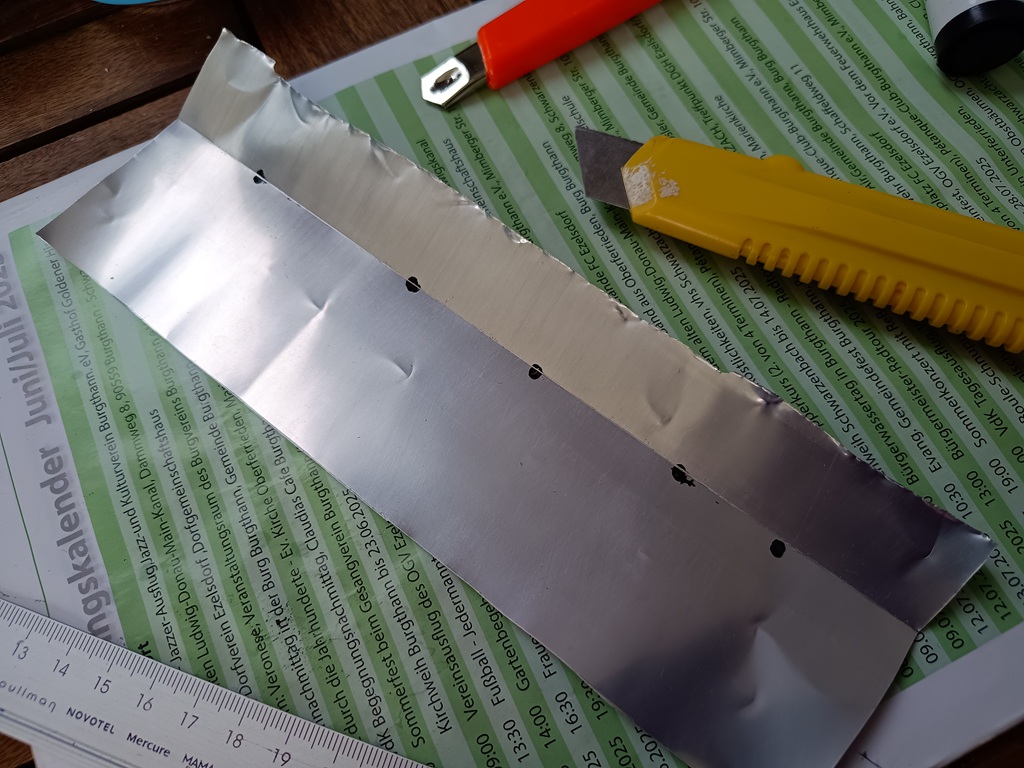
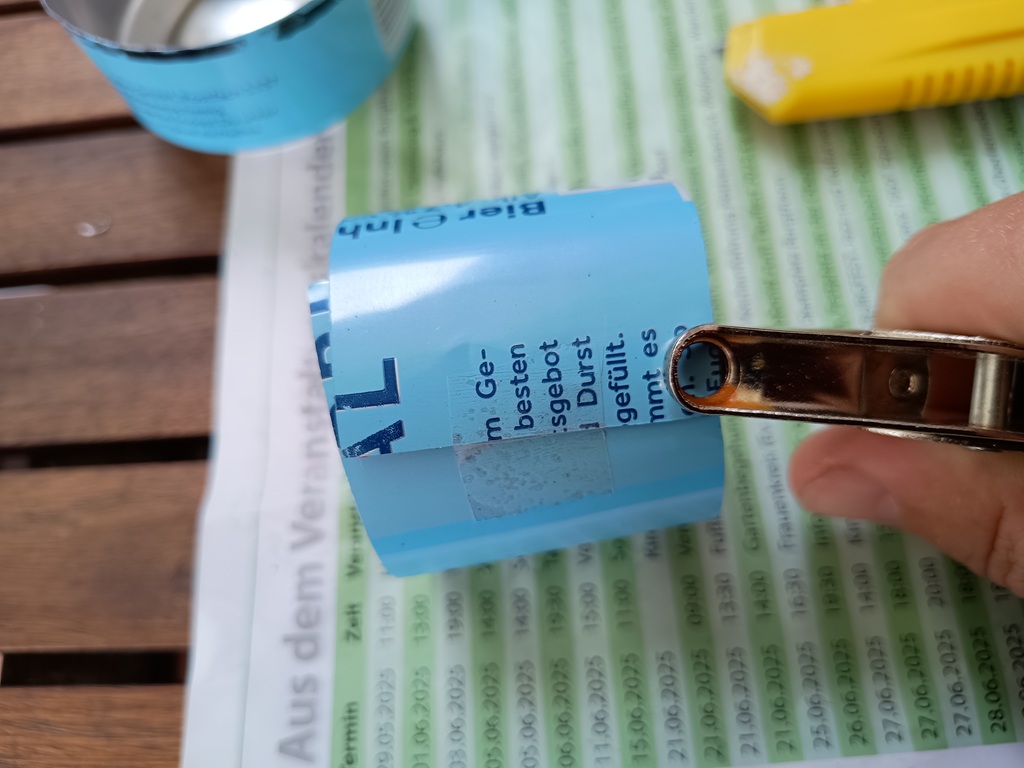
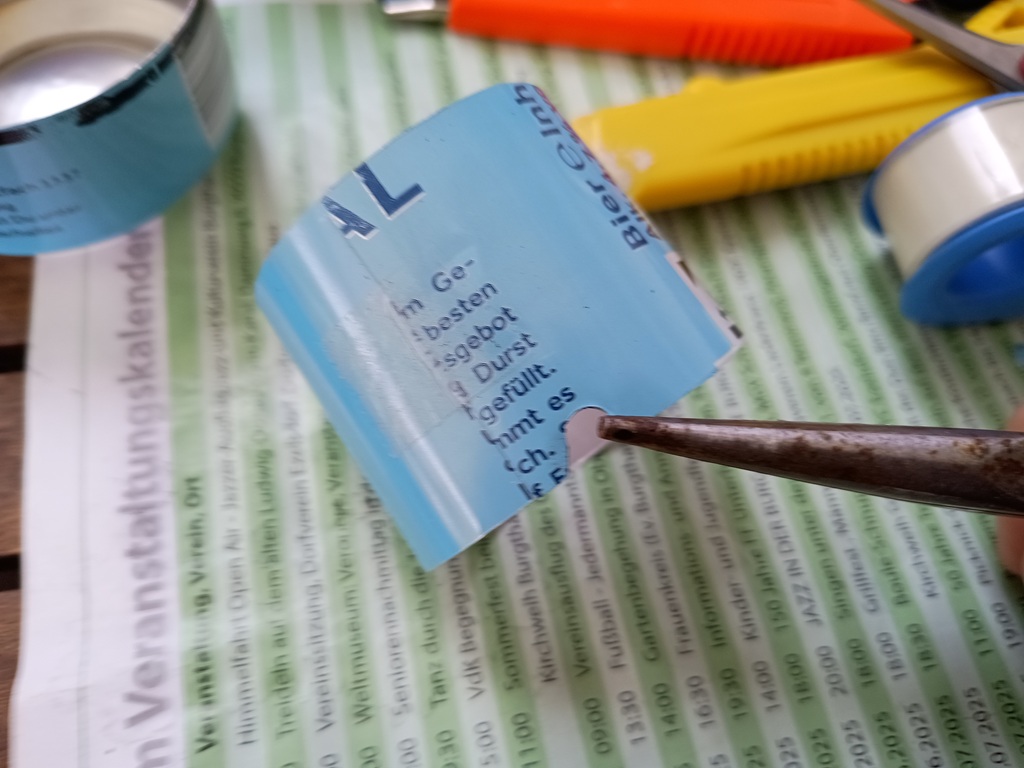
Step 9. Use the push pin to create the jets all around, more jets is quicker boil times, less jets makes for a more gentle cooker. I space mine around 1 cm apart, and right on the lip of the can. Higher and you can not use a pot stand. Angle the push pin upwards once your through, and make sure you don’t poke all the way through the inner wall.
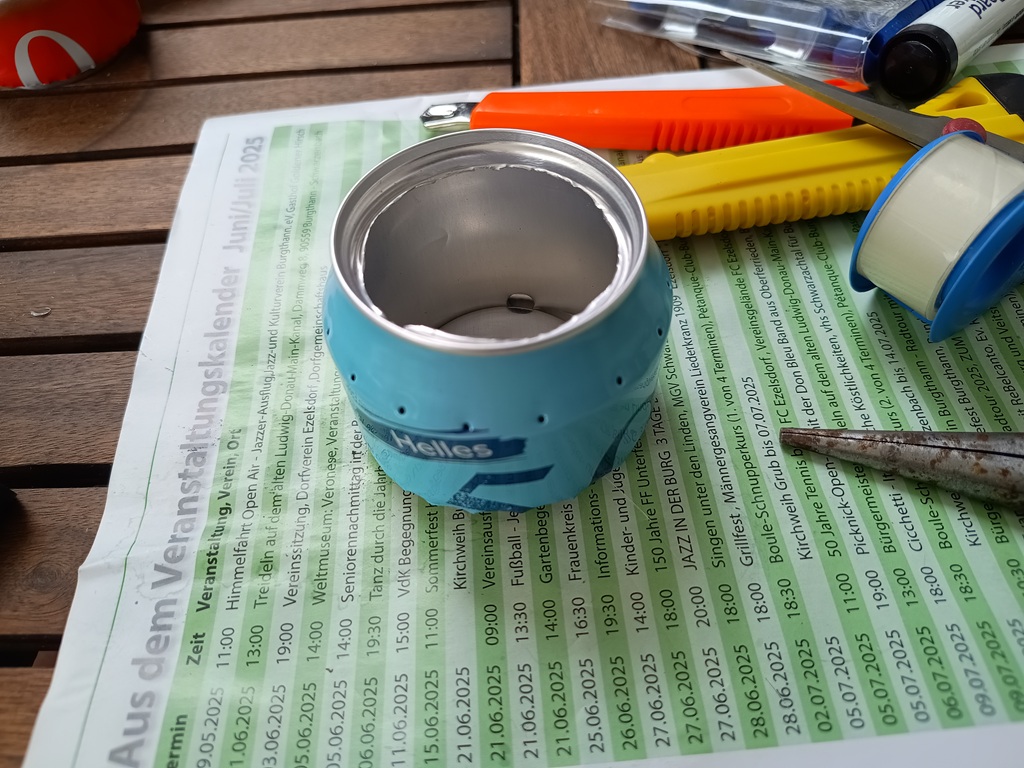

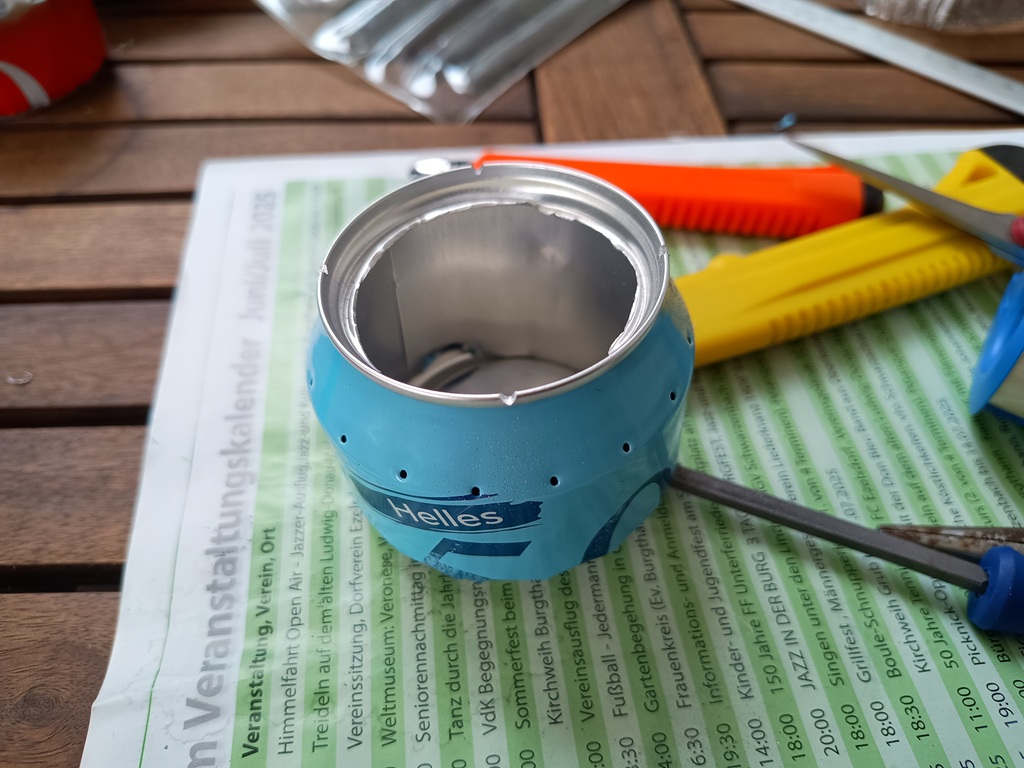
Step 10. With you V file, make 4 grooves in the upper lip off the stove. This makes sure that the stove does not over pressurize. And spits out fuel when properly going.
Step 11. Burn outside and in a controlled environment for the first time. Due to the little piece of tape that’s still in there your burning a bit of plastic. You do not want to be breathing pretty much any alcohol stove that your burning for the first time. So take precautions.
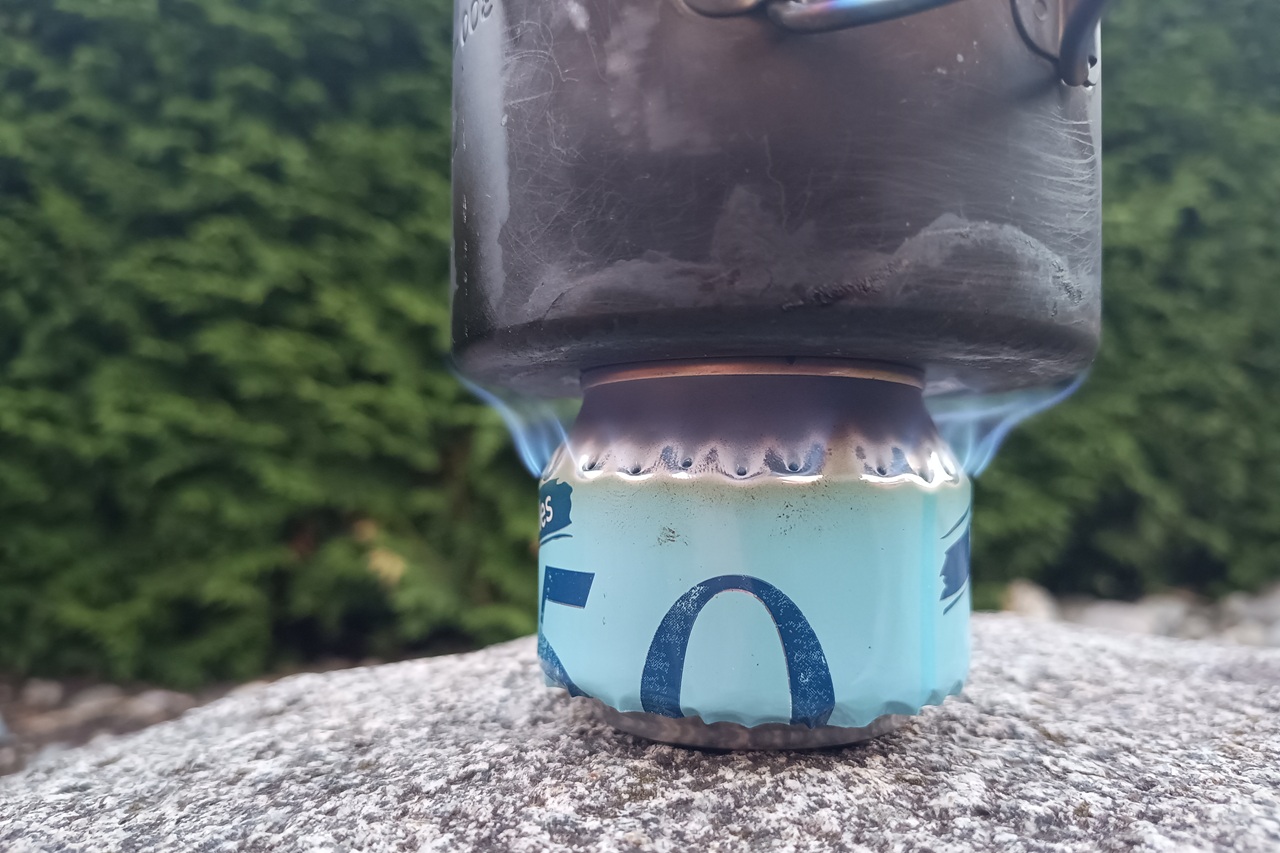
Using an Open Jet Alcohol Stove
The design is roughly inspired by a regular Trangia Alcohol stove, and works on the same principle. This DIY version however eliminates the need for a pot stand. And is quite a good chunk lighter, weighing in at 11 grams in total.
Boil times and burn
With my standard test of 400ml of water from the faucet, and 2 cl of alcohol stove fuel, I managed to get a 50 second to 1:05 bloom, and a boil including the bloom time of 8:29 minutes. Take the bloom time off that figure, and your left with a 7:24 boil time. Not the fastest, but as you can see with a couple tests I ran with similar stoves on the same day, pretty fuel efficient. All tests where run on the same day, and in windy conditions.
| Stove Type | Fuel Type | Water Amount | Fuel Amount | Bloom Time | Boil Time | Total Time | Notes |
|---|---|---|---|---|---|---|---|
| Open Jet 1 Red | DM Fuel | 400 ml | 20 ml | 1:05 | 8:29 | 11:05 | Burnout at 11:05 |
| Open Jet 2 Red | rossman | 400 ml | 20 ml | 1:05 | 8:49 | 14:09 | Long burn time |
| Capillary Red Bull Stove | DM Fuel | 400 ml | 20 ml | – | 5:45 | 7:05 | Quick boil but thirsty |
| Open Jet 3 (The blue one) | DM Fuel | 400 ml | 20 ml | 0:50 | 7:31 | 11:36 | Faster boil due to more jet holes |
Upsides
One big upside that I like most about these types of stoves is that the burn is very controlled and clean one you have got it bloomed. With this design you also do not need a pot stand. Simply put your pot on top once bloomed. Due to it being low to the ground it’s also a very stable stove, and knocking it over while stirring for example is difficult to do.
You also only need one can to make it, which I always like for practical reasons and to not have a bunch of material leftover. In Germany where I live, there is also Pfand on the cans, so I’m “wasting” 25 cents with every stove I build. But maybe that’s my Dutch cheapness coming in. I am therefore always on the lookout on the train station if I spot a can. Which I often do. One man’s trash is another man’s treasure. As the saying goes.
It’s also not only a pretty flame pattern to look at, but a very manageable one and controlled. You don’t have flames shooting up the sides of your pot, and you can still use your pot handle without gloves and burning yourself. A complaint I have with many other alcohol stove designs.
Downsides
The most obvious downside I see with this stove is that it needs the time to bloom up before use. In practice we are talking about ~one minute however, and their has not been a situation where that would matter one bit on any of my hikes. I have been hungry, but not one minute away from starving to death.
Possible downside number two is that it will perform more poorly in colder weather. Due to the fuel needing to be vaporized for the stove to work. More experience with this stove design in winter will be the judge of that however. And if you have already been out with this stove in winter. Then I ask you to share it down below in the comments. When colder temparures hit, I will update this article. I expect however that it will only effect the time to bloom.
Conclusion and comparison
In conclusion, I like these kind off DIY alcohol stoves, they are a bit more involved to make than other options. But if you have the patience and some tools to make them, they get better with practice. If they take the place of my favorite stove, that is still to be decided. But they can be great fun to make and play around with.
What I like most about this beer can alcohol stove concept is that they burn for a long time on 20ml of fuel, with times ranging from 11 minutes, to 14 minutes. And they burn very controlled once you got the pot on. This makes it a great option for a bit more regular cooking, or Trail Meals that require a bit more than just boiling water. For example a Red lentil stew.
Take a look at my previous articles about DIY Alcohol stoves to learn more about other designs.
Which Alcohol stove is your favorite to use? Let me know in the comments!
Happy hiking and Hike for Purpose!
Frank
I'm Frank, the main guy and owner of this website. Loves hiking, gear and bushcraft. And can get quite nerdy about them. In the woods several times a week preparing for my next hike. Always searching for another hill, which is quite difficult in the Netherlands. That's why I search around several countries. More about me on the about page.


2 Comments
I. Fernandes de Oliveria
This design mimics the Trangia B25 burner, but omites a detail of the Trangia, that is waick in form of a tube of cloth (Linen) around the inner wall – like a bottom less sock. In the Trangia page this wick is visible in a “exploded” stove.
Add a wick – cotton cloth, steel wool, fiberglass wool for insulation, carbon felt, ceramic wool… inside the closed camera, this reduce the bloom time.
Frank
I did a test with some cotton I had laying around, but did not notice any improvement. Will give some steel wool further testing. The cotton adds a lingering smell factor.