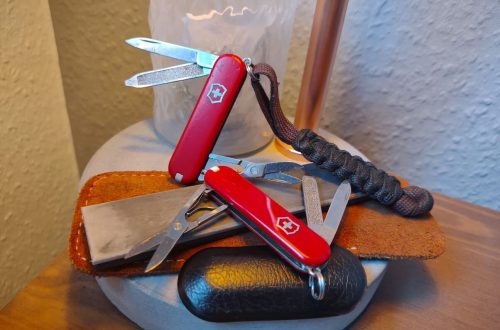
Popular DIY Alcohol Stoves
In this article I wanted to compare 5 popular types of Alcohol Stoves, and talk about the upsides and downsides of each of them. Lets light up some stoves!
With the five types of alcohol stoves I will focus on my experiences with them and put them to the test, where I measure and talk about the following three focus points:
- Boil times
- Ease of construction
- Ease of use
Alcohol stoves tested and discussed in this article:
Puck stove
SuperCat stove
Fancy Feast stove
Penny stove
Capillary (Rift) stove
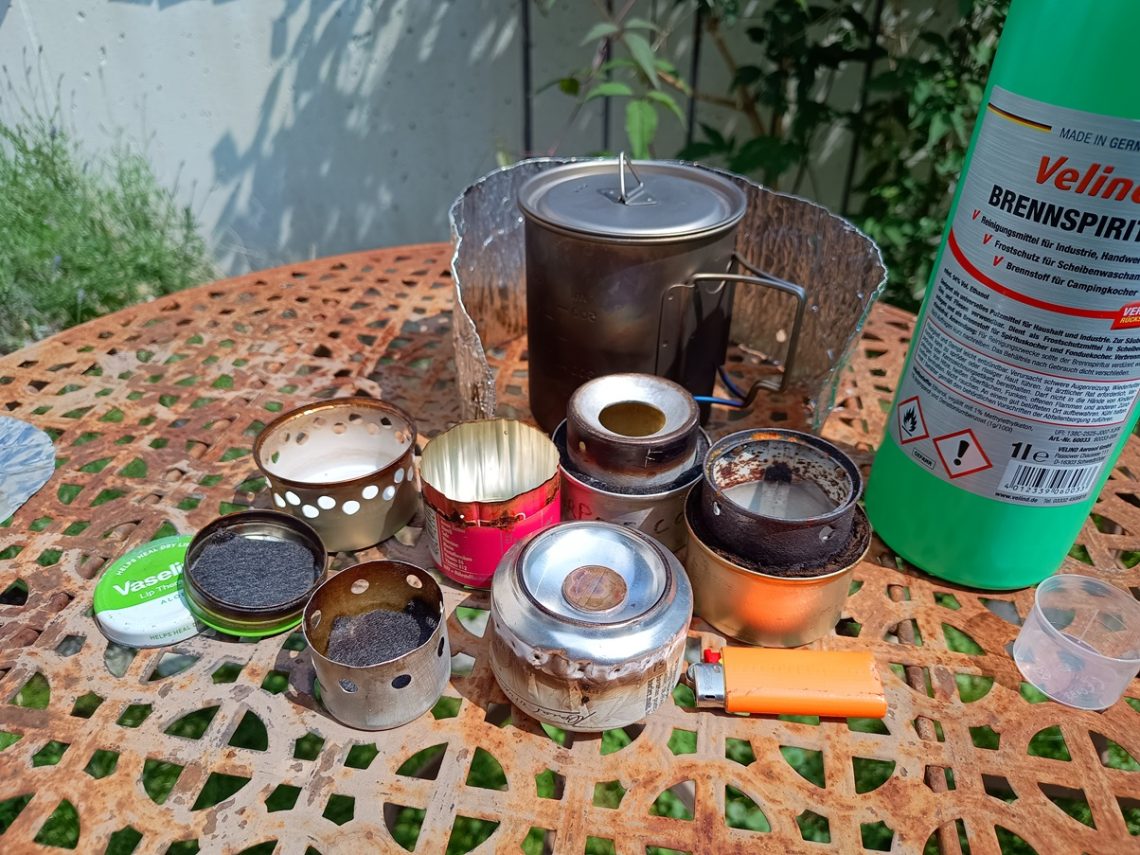
All these stoves are very lightweight, with the lightest coming in at 5 grams (capillary stove). For exact weights for each type of stove you will have to make your own, since there are many variables. Where possible, I added the weights of my stoves in the Ease of Construction talking point.
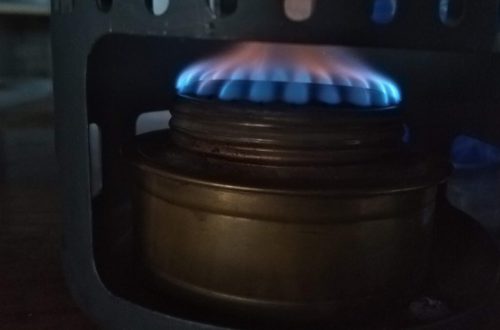
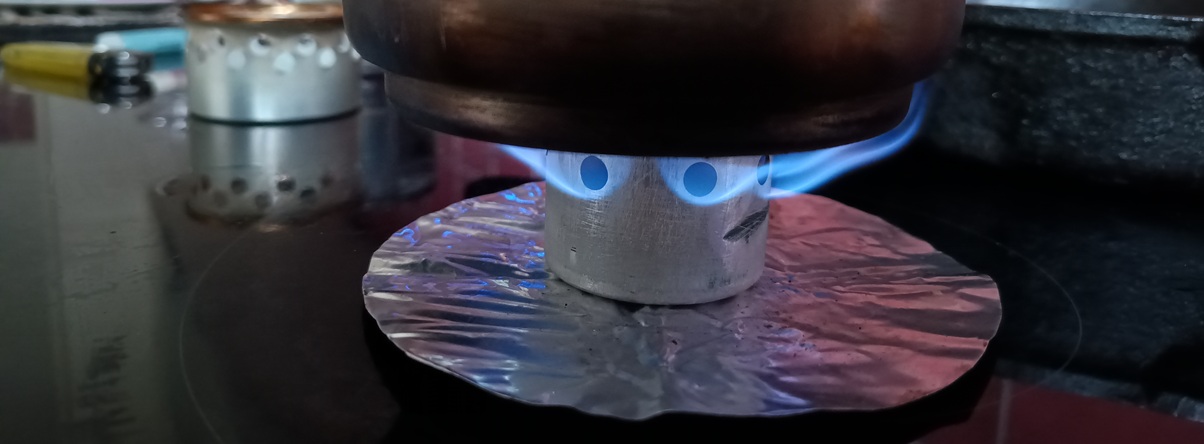
Puck Alcohol stoves
Puck alcohol stoves are made popular by several Cone windscreen designs, and often come in a set with them included. They are about as basic a burner as it gets, and can be made easily yourself.
Ease of construction
All you really have to do is get some carbon felt or fiberglass and put it in an empty vaseline can or similar. Takes all off about 2 minutes to make. And is a step up from a Tealight alcohol stove, while operating on the same principle. You can also forgo the fiberglass and carbon felt and use just the can with fuel in it to operate. This is obviously a risk when knocking it over and spilling, since there is nothing to absorb the fuel. The flame pattern will also be more sporadic without a wick in there.
Weight 17 grams
Boil times
Boil times with the stoves are one of the more variable ones in this test list, and can vary on the size of the can you use, and the distance that your pot sits on. In my testing with a small vaseline can stuffed with carbon felt I could get a boil of 400ml of water in 6:17 seconds. And it burned for a total of 10 minutes on 20ml of fuel.
With a different pot stand I could not a boil. So experiment around which works best for you. In the future I plan on making or buying a cone windshield, to see how this performs.
Ease of use
Due to its low heat output, a puck stove can be used to cook stuff it bit more gently than other stoves on this list. And I used it with some succes to have myself a barbecue for one. For grilling up sausages the heat output is not to hot for example. If your looking for a first introduction to alcohol stoves, this design is about as easy to use as you can get. And requires you to pour your alcohol in, light it up, cover with a pot stand. And your cooking.
SuperCat Alcohol stove
The SuperCat alcohol stove is a popular design by John Woods, and his very in dept article or pdf on this type of stove is very comprehensive, when your interested I recommend giving it a read. This design is relatively new to me, and can be made very easily and cheaply. With only a single cat food can.
Weight 6 grams
Ease of construction
All you need is a cat food, tuna, or potted meat can and a hole punch to make this stove. empty out the can and give it a clean, squeeze the inner rim of the opening with a pair of pliers, and go around the stove with the hole punch (~6mm) to make this stove.
The alcohol sits in this stove also without any material, and is therefore also a spilling hazard. When knocked over, you better have some extra water on hand to keep a forest fire from happening.
Boil times
Boil time for 400ml of water with 20ml of Bio Ethanol fuel was 6 minutes 30 seconds, which is pretty fast for an alcohol stove. You do need to prime it and give it around 30 seconds for the flames to come out of the holes. So total time is more around 7 minutes to get 400ml of water to a boil. As always, your results may vary, depending on the holes you make, wind, temperature, etc.
Ease of use
I have tried a couple of different designs and ideas with different results, and this stove can be a bit finicky to get right and use. After lighting the stove, you will need to wait until the alcohol starts to boil or vaporize before putting your pot on. And a cold and wet pot can put it out in my experience. Move to fast with putting your pot on, and you can start again.
Another prototype I made from a leftover bottom of a hairspray can worked a bit better, it is sadly also a stove that is very hungry. And could not get in any of my tests 400ml of water to a boil with 20 ml of alcohol.
This design is for those reasons not my favorite, and I will continue to toy around with versions of it. But a place in my backpack this stove will not have anytime soon. Do you disagree? Let me know in the comments! I have since writing this article made a dedicated one for the SuperCat Alcohol stove for further reading.
Fancy Feast stove
For a few years now already, a Fancy Feast stove is my favorite alcohol stove. After testing a bunch of different designs for DIY projects, and commercially available options like the Trangia stove. The Fancy Feast design wins out in almost any test I come up with.
Weight 24 grams
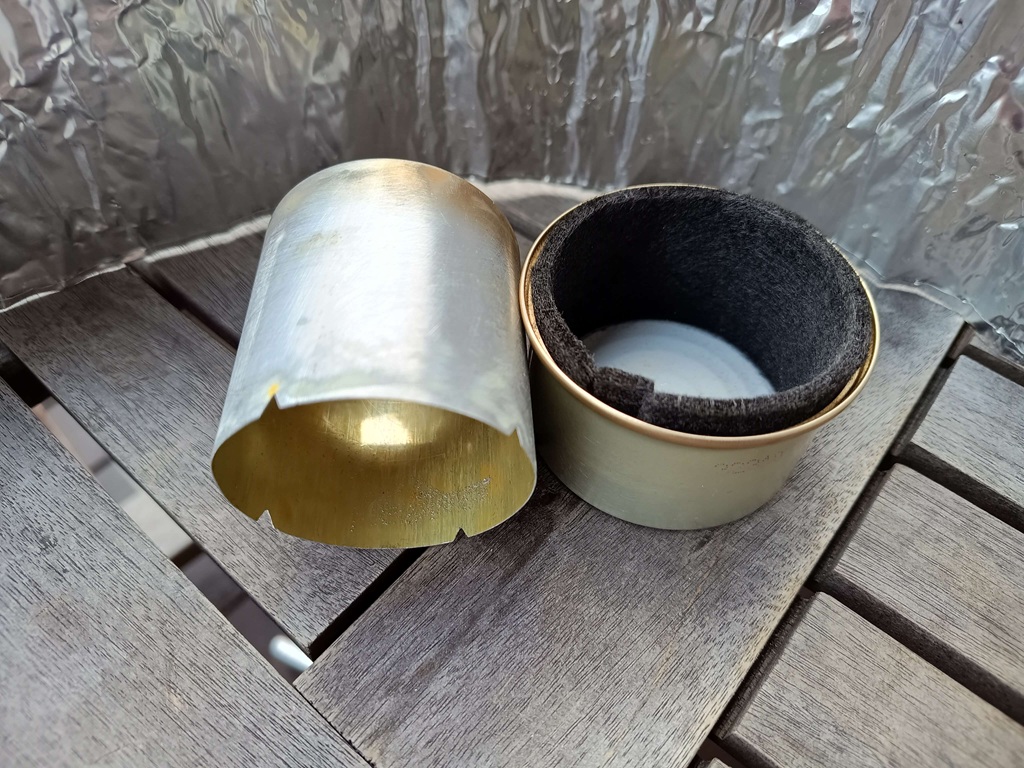
Ease of construction
The idea behind the Fancy Feast stove first originated with Zelph stoves, and the Tomato paste can design came from Hiram Cooks over on YouTube. It is one of the easiest stoves to make for a DIY project, and you can learn how in my previous three articles I did on this design.
It comes down to emptying the can, finding some wicking material and cutting the Tomato paste can. The whole process takes around 15 minutes. And does not require a lot of exact measuring or difficult steps. So it can be a fun project for a DIY afternoon.
Boil times
Boil times are fast with a Fancy Feast, and I can get a pretty reliable boil for 400ml of water within 6 to 7 minutes on 20ml of Bio Ethanol. Which is pretty fast in my tests with these types of alcohol stoves.
Ease of use
By far my favorite feature for the Fancy Feast type stoves is that it is a joy to use, no difficult priming, no saying a prayer when you put your pot on. And no pot stand needed. Pour some alcohol in, wait a second for the wick to absorb the fuel, light it up and put your pot on. That’s all there is to it.
I used to enjoy fooling around with alcohol stoves that needed to prime a lot more, such as jet or penny can stoves, but I have lost that somewhat over the years. Right now I enjoy the ease and simplicity of the design that is not only my favorite, but many alcohol stove enthousiastst out there. I recommend you try to make this one. And don’t let the Carbon Felt scare you, this can be had pretty cheaply online, or if you are unable, a cotton wick from an old shirt works just as well. And will last for a lot of use before needing replacing.
Penny stove
If I can remember correctly, the penny soda can stoves are the first alcohol stoves that I made at ~12 years old. And still holds a place after all those years. Penny stoves have the simple pleasure of being a joy to look at while lit, and form a nice ring of jets from the alcohol vapor, similar to a normal gas stove.
Ease of construction
Maybe its just me, but building a penny can stove I have screwed up more times than I can count. Mainly due to fitting the two halves of the stove design together. Here is where the slightest rough edge can cause a split. And makes it so that you have to start over again.
I therefore do not recommend this as your first alcohol stove design if you are just alcohol stove curious. And not very handy or patient. Others on this list are way easier to construct, and a lot more difficult to screw up than a Penny can stove. The internet is full of tutorials on how to build a penny can stove, I recommend watching a couple YouTube video’s where a lot of content creators have hours upon hours of video on the subject. And as always, zenstoves.net is a great resource considering all things alcohol stoves.
Weight 14 grams
Boil times
Penny stoves tend to be quite hot, due to their pressurized design. Priming will take the longest, and bringing 400ml of water to the boil I saw at around 5:30 minutes. But in total you will often need a few minutes, and sometimes a few tries, to get the alcohol stove lit. Which also eats away at the boil time in my opinion.
Ease of use
Penny can stoves are not the easiest to use, and require time to heat up and prime to get burning over the jets. Therefore it is needed to get a primer plate or binding some fiberglass wick around the stove to be able to prime it easily. Once lit you often need a pot stand depending on the design, and you will need to put a penny in the fill port at the top. That is to keep it burning only via the jets, and thus preventing wasted fuel.
For an introduction to alcohol stoves, I would steer away from penny stoves or similar stoves that you will need to prime externally. This can turn people off quite quickly, especially coming from canister stoves.
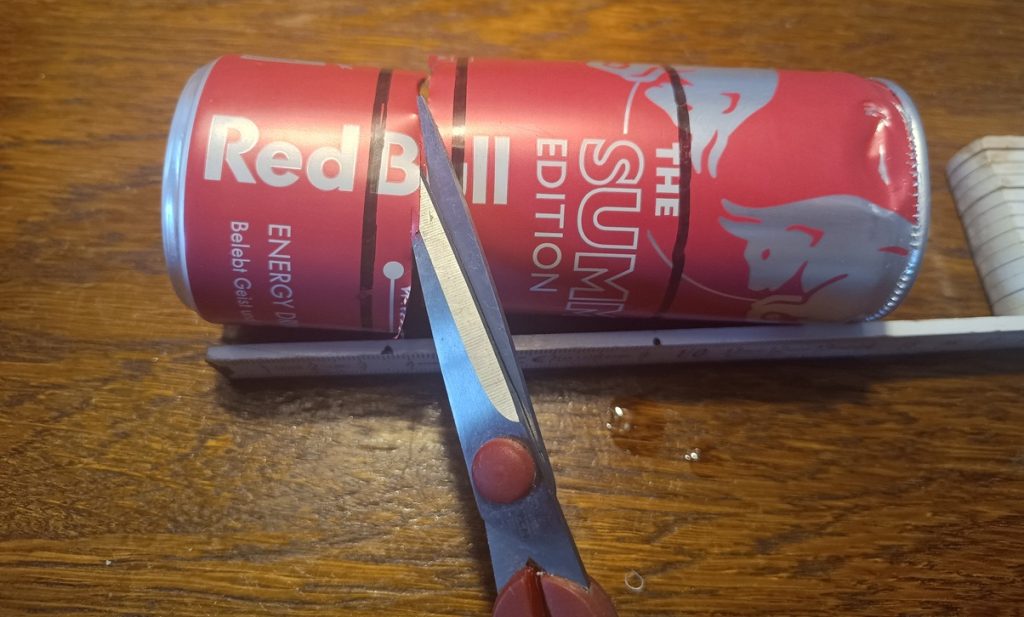
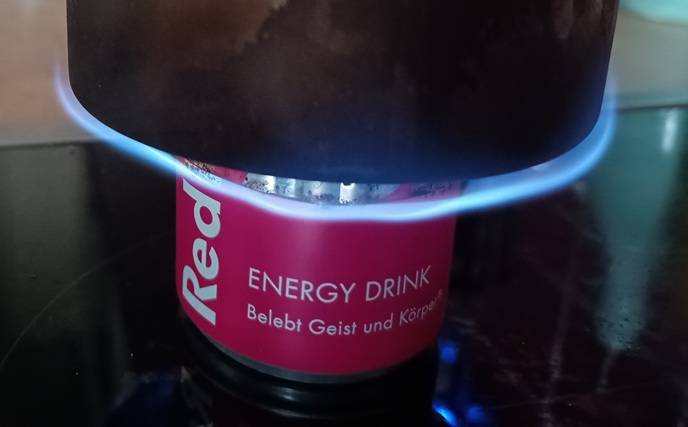
Capillary (Groove) stove
A recent addition to my testing and playing around with DIY alcohol stoves are Capillary stoves, in its basic form it is one of the easiest stoves to build. And can be used with great succes. With way faster bloom times then closed or open jet designs, the stoves I have build and played around with bloom within 5 seconds of lighting.
Check out the dedicated article I made to this stove type: Groove Alcohol stove
They are quite a bit thirstier than Fancy Feast stoves in my testing though. And spill easily due to not having a wicking material. Care needs to be taken that your working on a solid base. The upside is that you can snuff them out, and recover any leftover fuel quite easily.
Weight 5 grams
Ease of construction
My first design that I got from the YouTuber Viscous Landan was incredibly easy to put together, and even with minimal effort you can get a functional stove within a few minutes of tinkering. It can also be put together using only 1 soda can (Redbull in my case). Which I like since you don’t have to waste more. In Germany there is a 25 cent return for every soda can, so my Dutch cheapness shines through in wasting more than I need to.
Boil times
Boil times are quite fast, at my testing I got a boil on 400ml of water at 6:37, using 20ml of alcohol it burned for a total of 9 minutes. Boil times vary greatly according to my testing with the wind factor and a closed windscreen or partly open. With a fully closed windscreen burning way hotter, at 5:39 a boil, and burning for only a total of 6:53. Flames shoot out all over the place, and even go way above the windscreen. Which is not something I am looking for in ease of use.
Ease of use
Ease of use is good, and it is easy to light and get set up. However you really need to pay attention that you do not close the windscreen around it, or have a windscreen with a bigger circumference. On a windy day, this gets tricky because you also need to block the wind.
I think that the alcohol vaporizes to much in my particular setup, and it therefore burns where it should not be burning. This also made the handle of my pot completely unusable and unsafe with bare hands. One of my bigger complaints with many alcohol stoves.
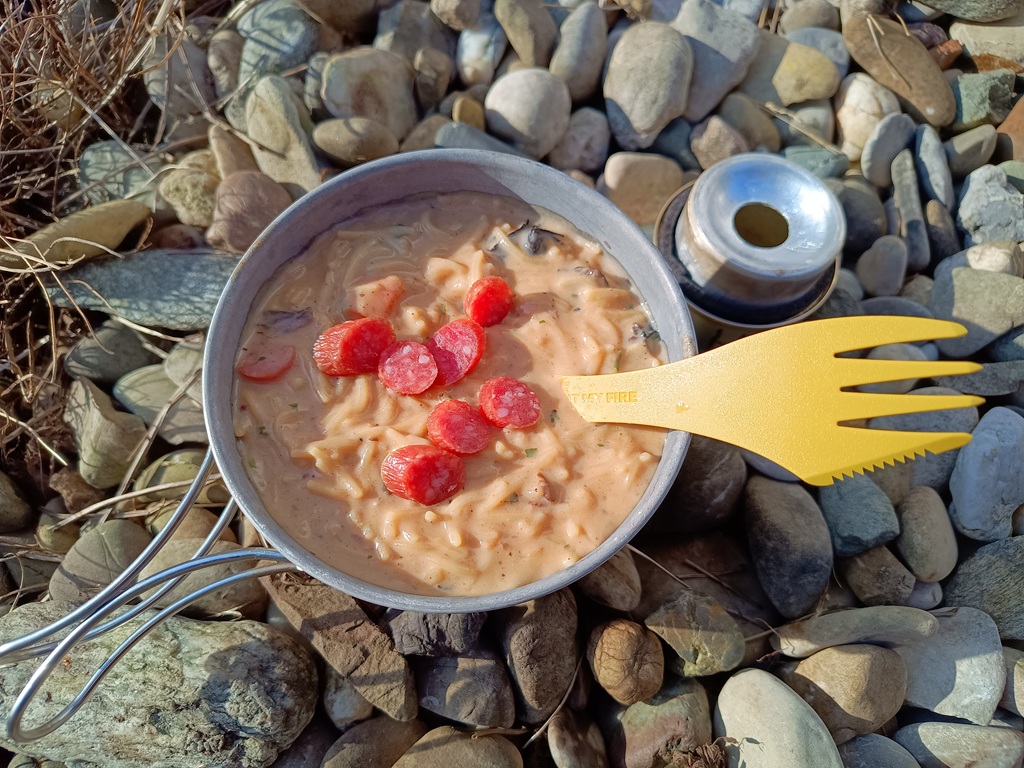
The search for the perfect alcohol stove
The search for the perfect alcohol stove is not over for me, and I enjoy tinkering with different designs to see what works best in my use. When you are curious about Alcohol stoves then I recommend giving the ones on this list a try and see what works for you, remember to use a windscreen, and be careful in constructing and operating the stoves. You are playing with fire overall.
Take a look at the many other articles I did on this site regarding alcohol stoves. And let me know what your thoughts are.
Up to this point of writing this article, the Fancy Feast stove (mark 3) is still my favorite. Which is yours?
Happy Hiking and Hike for Purpose!
Frank
I'm Frank, the main guy and owner of this website. Loves hiking, gear and bushcraft. And can get quite nerdy about them. In the woods several times a week preparing for my next hike. Always searching for another hill, which is quite difficult in the Netherlands. That's why I search around several countries. More about me on the about page.