Groove Alcohol stove
Easy, single can design, and one of the lightest. That’s the Groove Alcohol stove in a nutshell. Rapid bloom time of only a few seconds and no pot stand required. I like this design, here is how to make one and some points on use.
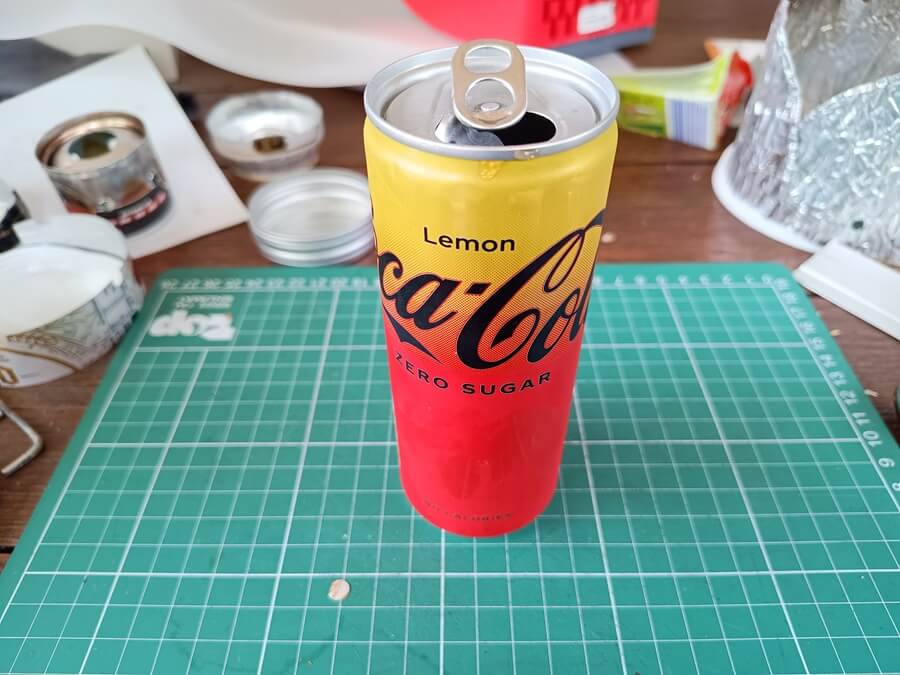
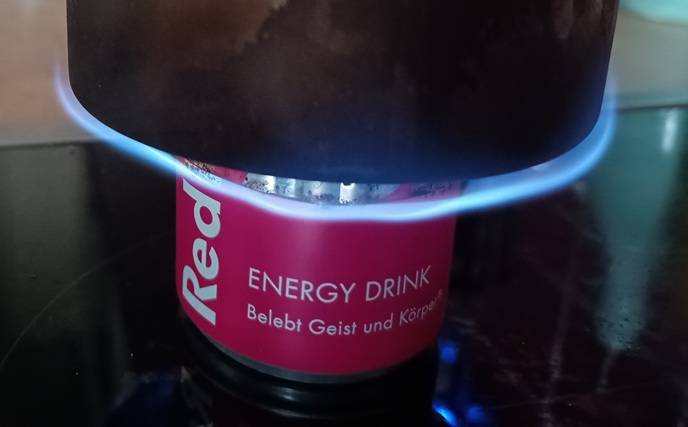
What you will need for this Alcohol stove design is a single 250 ml soda can, could be an Energy drink can, or in my case, a cola can that was kicking around in my parents fridge expired since February. Can also be made with the wider cans, or any sort you like really. The trick behind this stove is that it uses the Capillary effect to draw the alcohol up through the channels you make, resulting in rapid bloom times.
Tools you will need are:
- Stanley knife
- Scissors
- Push pin
- Ruler
- Marker
You can also improvise this stove on the fly with just a Swiss army knife, but for at home, a couple of tools really help out.
This design was inspired by multiple people over on YouTube, mostly by the YouTube channels LittleBitWorks & Viscous Landan.
Construction of the Groove Alcohol stove
This design is easy to build and uses a single can as mentioned, this makes it a cheap stove to build and also does not required the can to be fully intact or closed like some other designs. Any roadside can that is not to damaged could be used, and therefore can also be recycled for free entirely if you keep an eye out for a can.
With a few minutes and tinkering you have yourself a dependable and easy to use stove.
1) Cut out the top of the can by scoring a line a few times with a Stanley knife with moderate pressure, and when you start to go through you can punch it and wiggle it out.
2) Make a mark from the bottom of the can at any height you like, I did 3 cm this time.
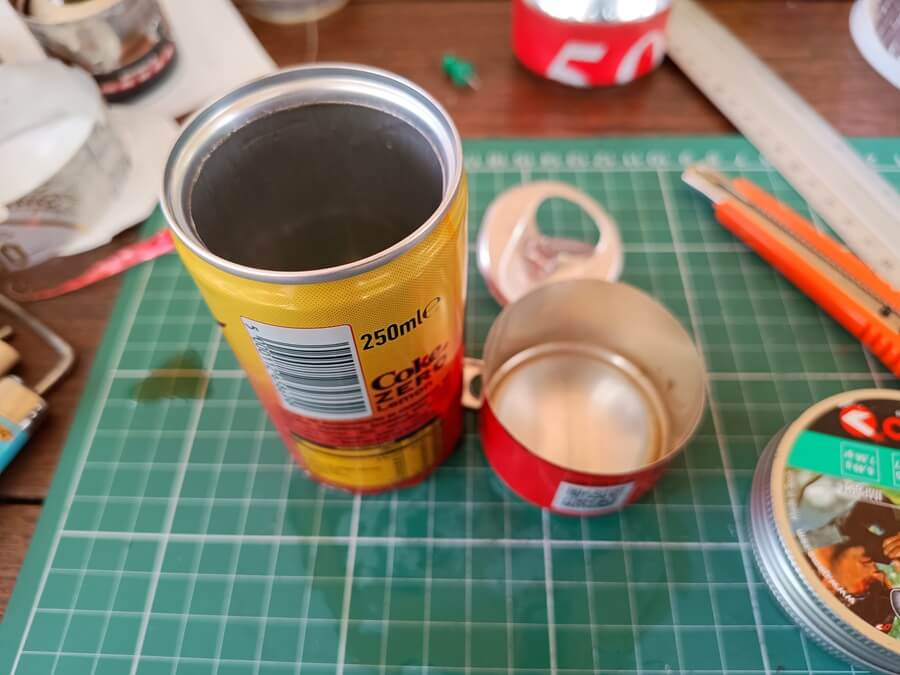

3) Cut a little above this line with the Stanley knife, and clean up the edge with scissors.
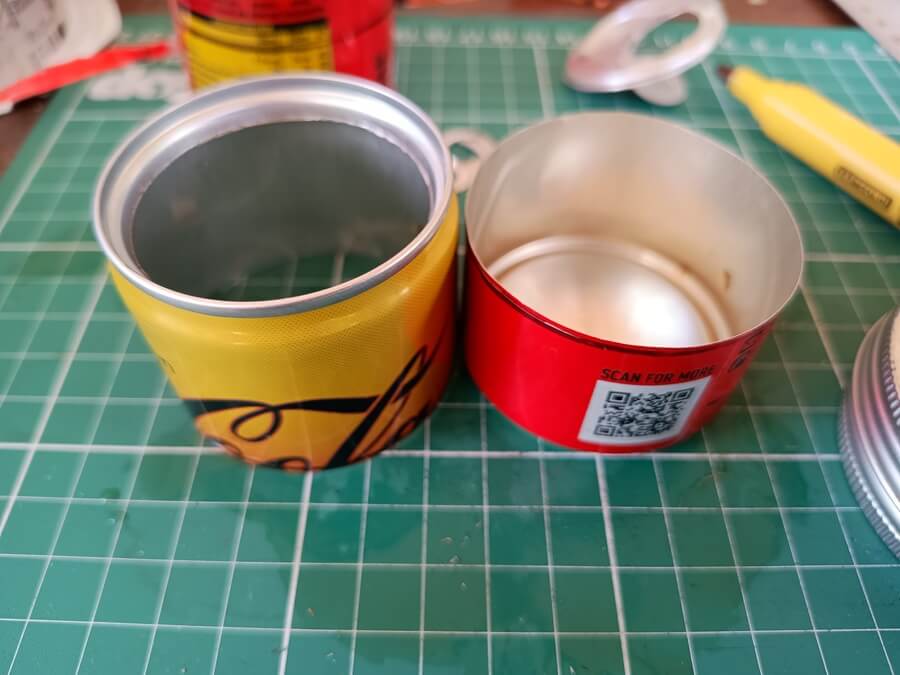
4) Cut 3.5 to 4 cm when placing the top of the can upside down. Again, cut a little above your mark and clean up with scissors. Holding the scissors with your left hand as a righty really helps here btw.
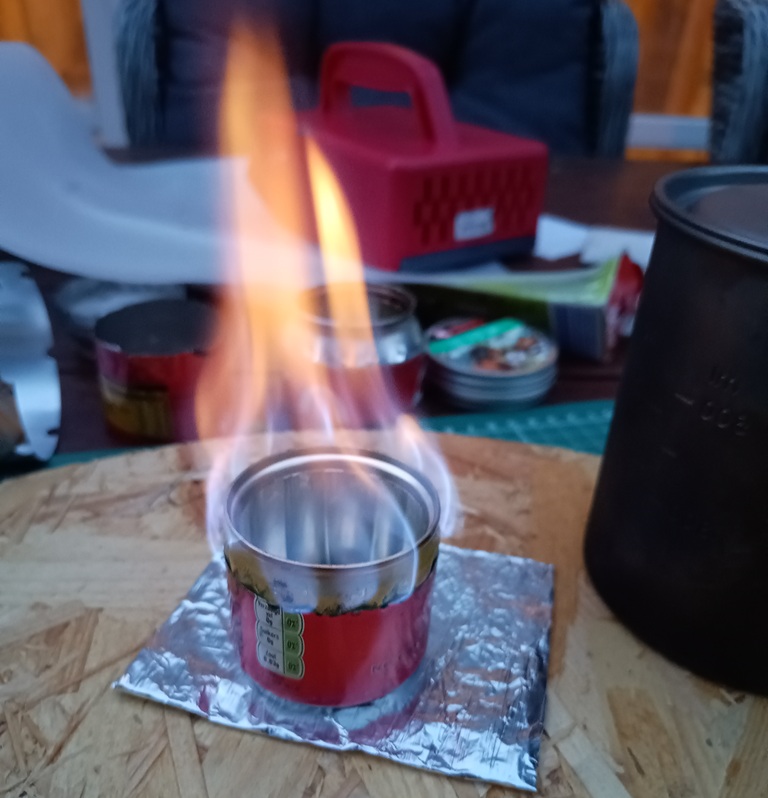
The more room in between your top (inner) part is compared to the bottom, the hotter and quicker it will boil and burn. I tend to favor slower boil times with lower heat, because I also like to cook some other stuff than to just boil water. Experiment and see what works best for you. With certain types of fuel and wind, higher designs also flare up a lot more around your pot. A feature I don’t care for so much, I like the shorter designs for that reason.
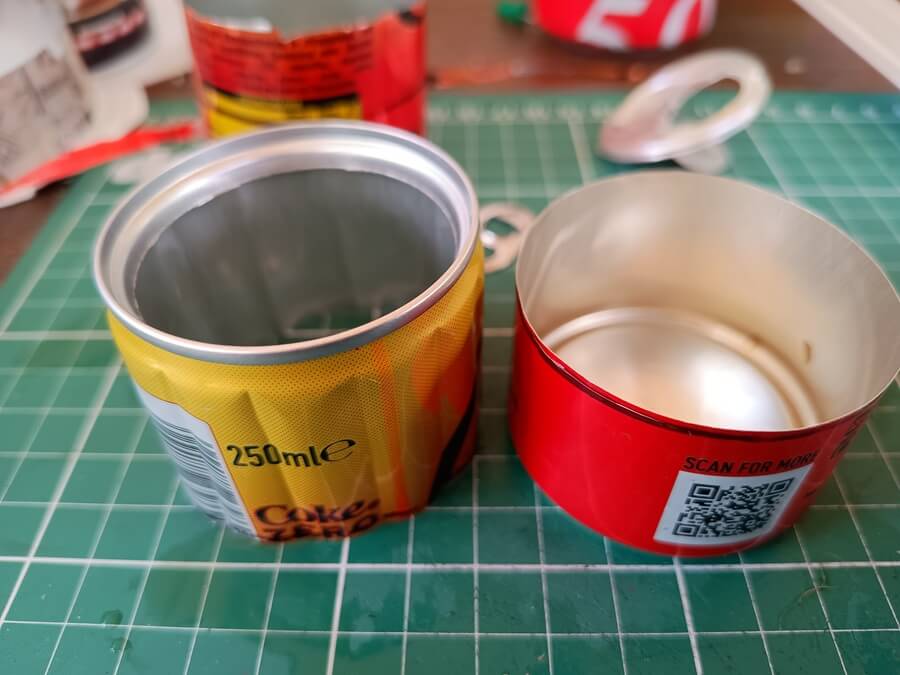
5) make grooves in the top piece with your ruler, carefully but forcefully push the ruler all the way the length of the can to make the grooves where this stove gets its name from. I eyeball this part, and do a groove about every CM. Be sure to make the grooves the entire length, and also include the little rim on the very top off the can. Put two fingers behind the can, your ruler or straight edge against the front. And press.
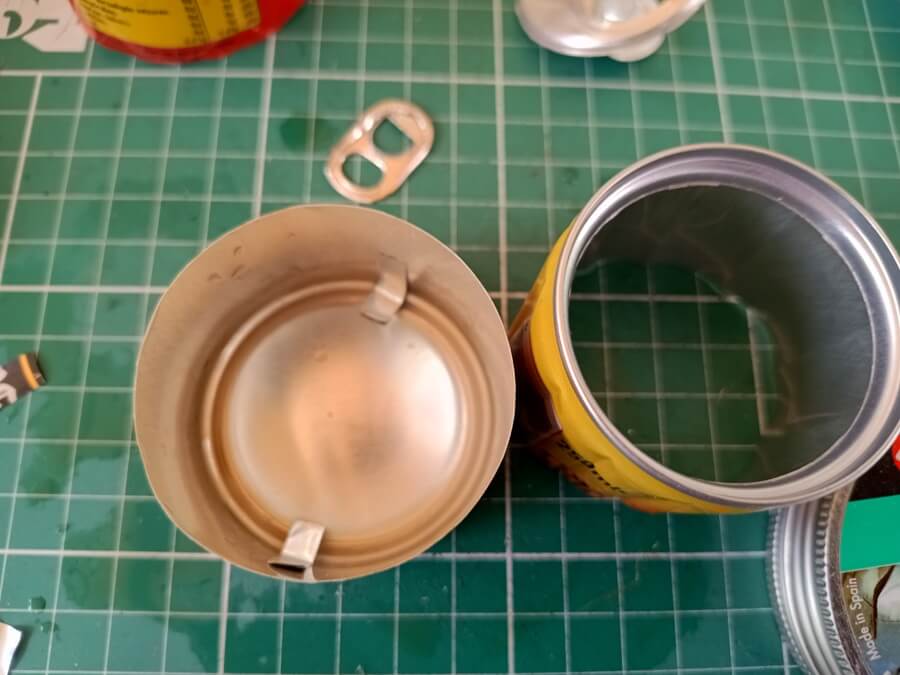
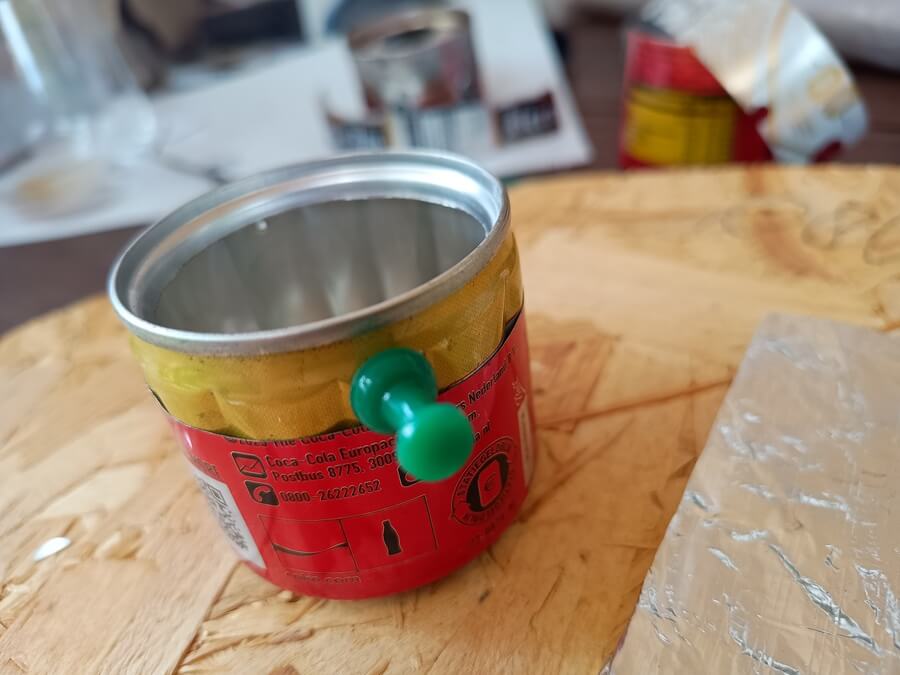

6) Assemble the stove, for an added little trick, insert two little strips off leftover can in between the walls on the bottom. This takes care of a slight issue of leaving a bit of unburnt fuel. Highly depends if you face this issue however, I only had it really be a consistent issue with the first prototype I made.
7) Very important and do not forget, use the push pin to make two little breather holes in the top part of your stove. Without, and your stove will spill over while burning. Don’t burn yourself.
Finished weight: 6 ~7 grams with 250ml can,
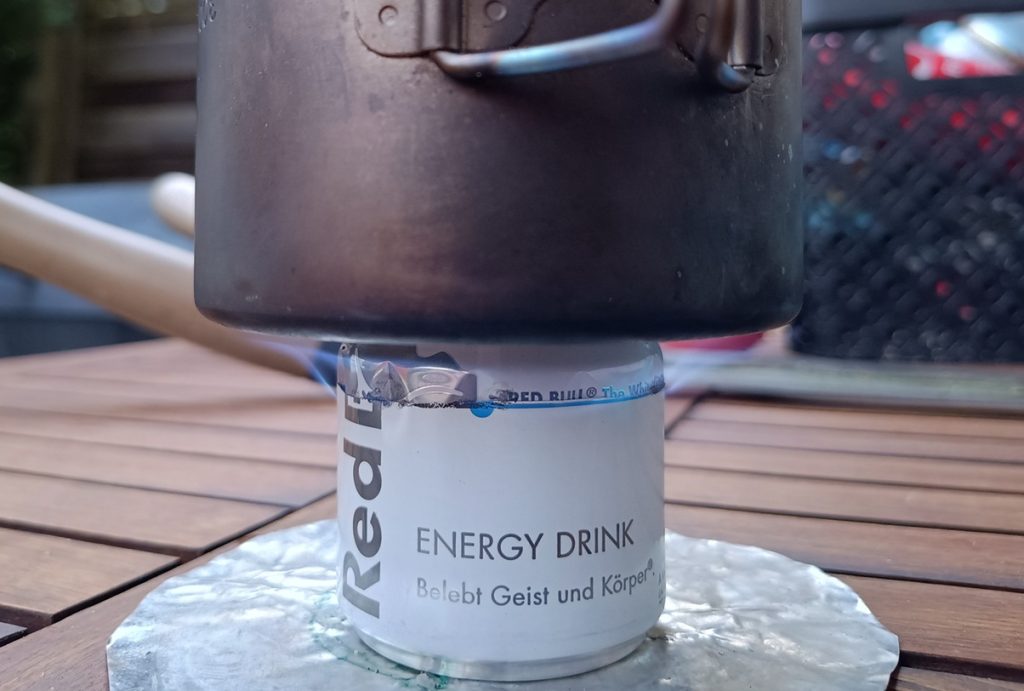
Using a Groove Alcohol Stove
This Alcohol stove design is very easy to use, and probably one of the best to start out with if your coming from another type of stove like canister or white gas. Its a great performer that you put alcohol in, light up, after a second or two put your pot on, and your off to the races.
No difficult priming or primer plates needed. And no pot stand needed. This makes it a breezy experience, and with its easy one can design and no complicated steps, its a great starter or finisher stove depending on your liking.
There have been solutions out on also making a simmer ring, or even adjustable heat output for this design. And often combine another strip off aluminium from the same or another can that you can slide up and down the outside to control the amount of exposed “jets”. I will experiment with this in the future, so keep up to date by following the blog!
With different fuels in this stove I noticed a big difference in the aggressiveness of the flame pattern, with the Dutch spiritus I got that is a little dirtier burned a lot less aggressive. Experiment with different fuel types to find the one to your liking.
Boil times & Fuel consumption
A Groove Alcohol stove is quite thirsty in my experience, and eats up fuel a bit more than other designs.
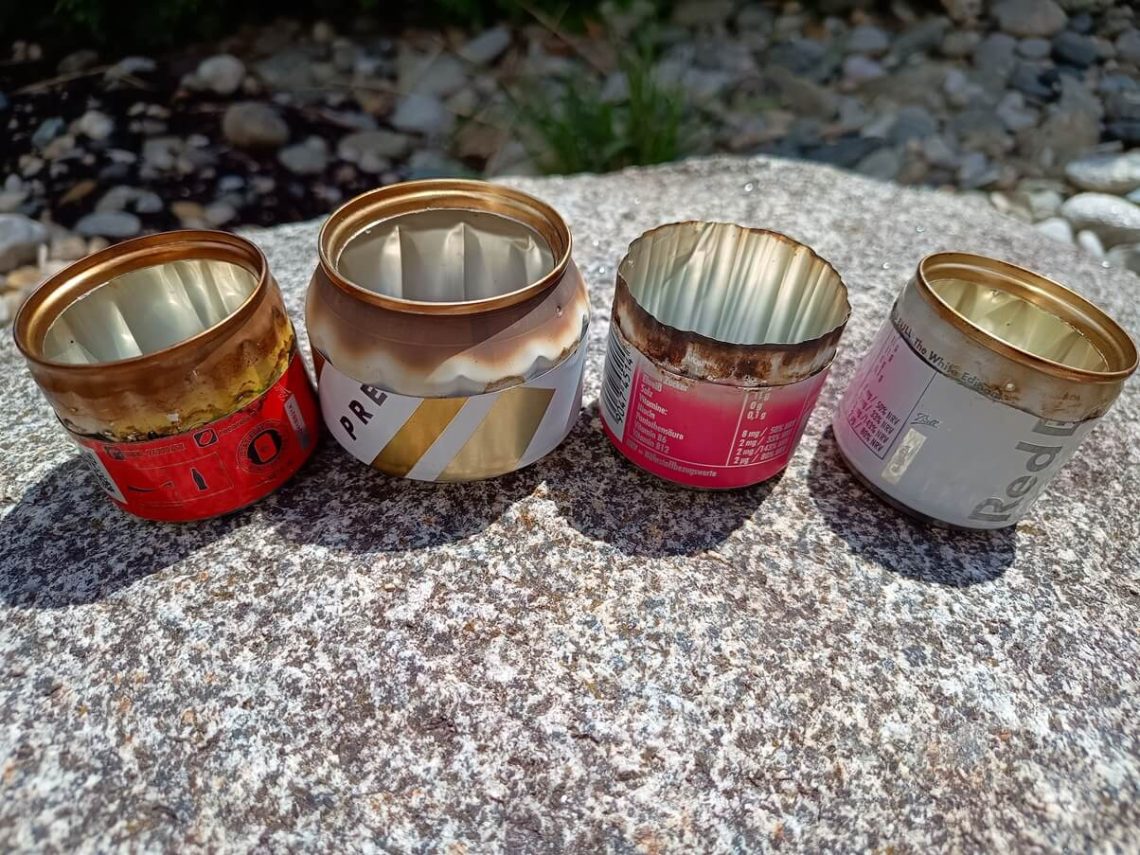
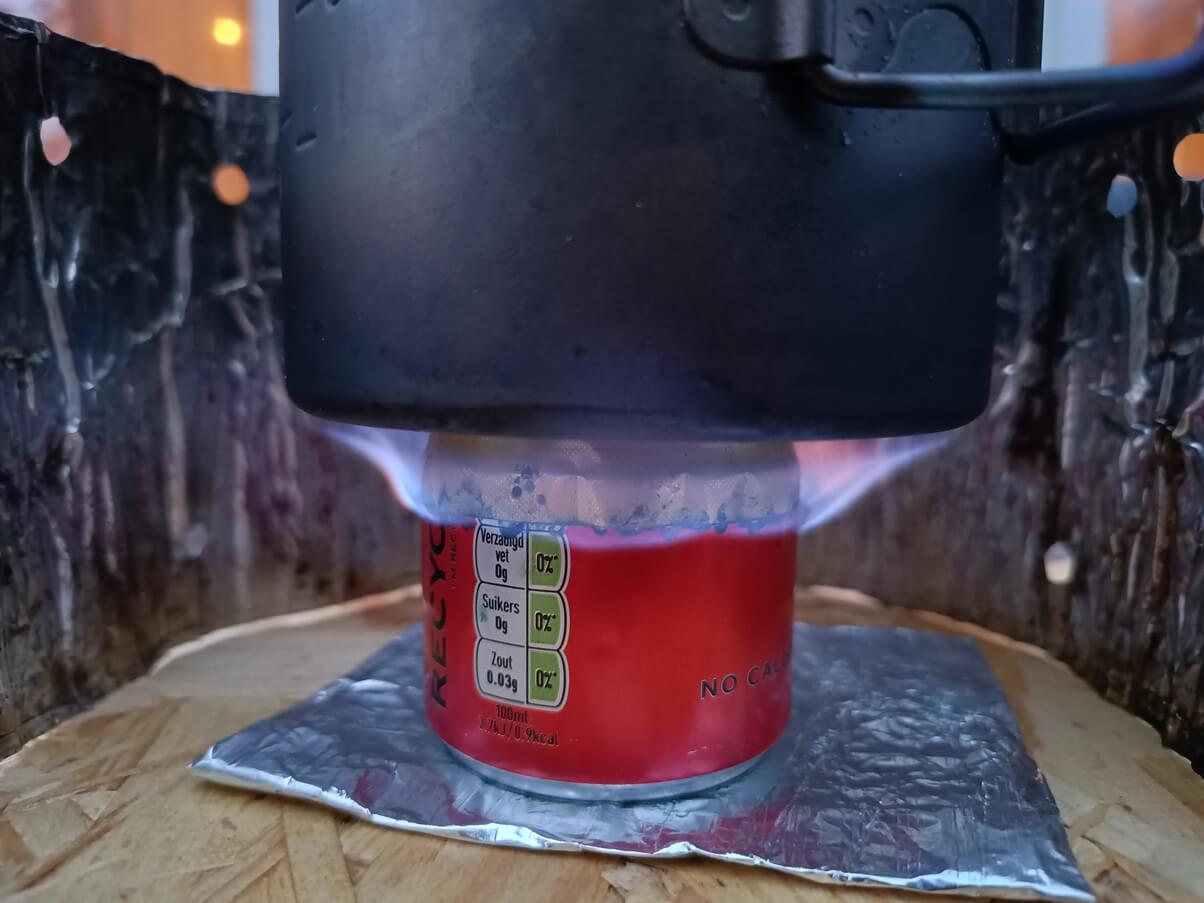
Compared to for example a Open-Jet beer can design, which burns for 14:09 minutes with 20ml of fuel, the Groove design “eats” 20 ml of fuel up in the following way. Tests where done with 400ml of water.
| Red Groove Stove | White Groove Stove |
| Boil: 5:16 Total burn time: 6:07 | Boil: 6:19 Total burn time: 7:01 |
The Red one I ended up cutting back more to see how that would impact it, and ended up being a gap between the lower and upper off 2 cm.
The white one ended up being 1.2 cm from the top. And you can see the impact that had in the table above. Where the larger gap had a quicker boil time, but a faster burnout. And the shorter one had a longer boil time and also a longer total burn time. It’s good to experiment to see what you like best, and works best with your pot. I did all my tests with the Tomshoo 750 ml pot.
Noise
Its funny to talk about noise with Alcohol stoves, since this is not really an issue. I thought I mention it however since this design in use you can hear more than other Alcohol stoves. Which was surprising to me.
Any noise compared to other stove systems is basically non existent however. And the noise is minimal. You can only really hear it when your right next to it.
Older designs
I started out with cutting the top of the can off as well, this is more hassle than its worth in my opinion. And also results in a less durable design. With the top rim of the can intact, but the inner cut out you end up with a sturdier design that will last longer, and also removes the need for making 2 cuts precise. So I recommend going for the design described in this article.
Conclusion
I like this design a lot, and I think you will too. If you are curious about why so many hikers like Alcohol stoves than this one is a great one to start out with to see what the fuss is about. No specialty tools or materials needed, and you just need a single can to make this one. So try it out and see how it works for you and your needs.
For my favorite Alcohol stoves its still a toss up between the Fancy Feast, Open jet beer can, and this design. Which is yours?
Happy hiking and Hike for Purpose!
Frank
I'm Frank, the main guy and owner of this website. Loves hiking, gear and bushcraft. And can get quite nerdy about them. In the woods several times a week preparing for my next hike. Always searching for another hill, which is quite difficult in the Netherlands. That's why I search around several countries. More about me on the about page.


You May Also Like

Anker PowerCore review | Hiking
Opinel carbon vs Inox