Fancy Feast stove | Improved
The Fancy Feast stove has quickly become my favorite alcohol stove, with its ease of construction, no priming, and no pot stand, it’s just a joy to use. In tinkering around and trying multiple different versions of the same idea. I have found an improvement to make it lighter and more rust-resistant. Read on for the result!
Quick jump guide
- Tools and requirements
- Design and construction
- Weight saved | No more Rust
- Boil times
- Possible further improvements
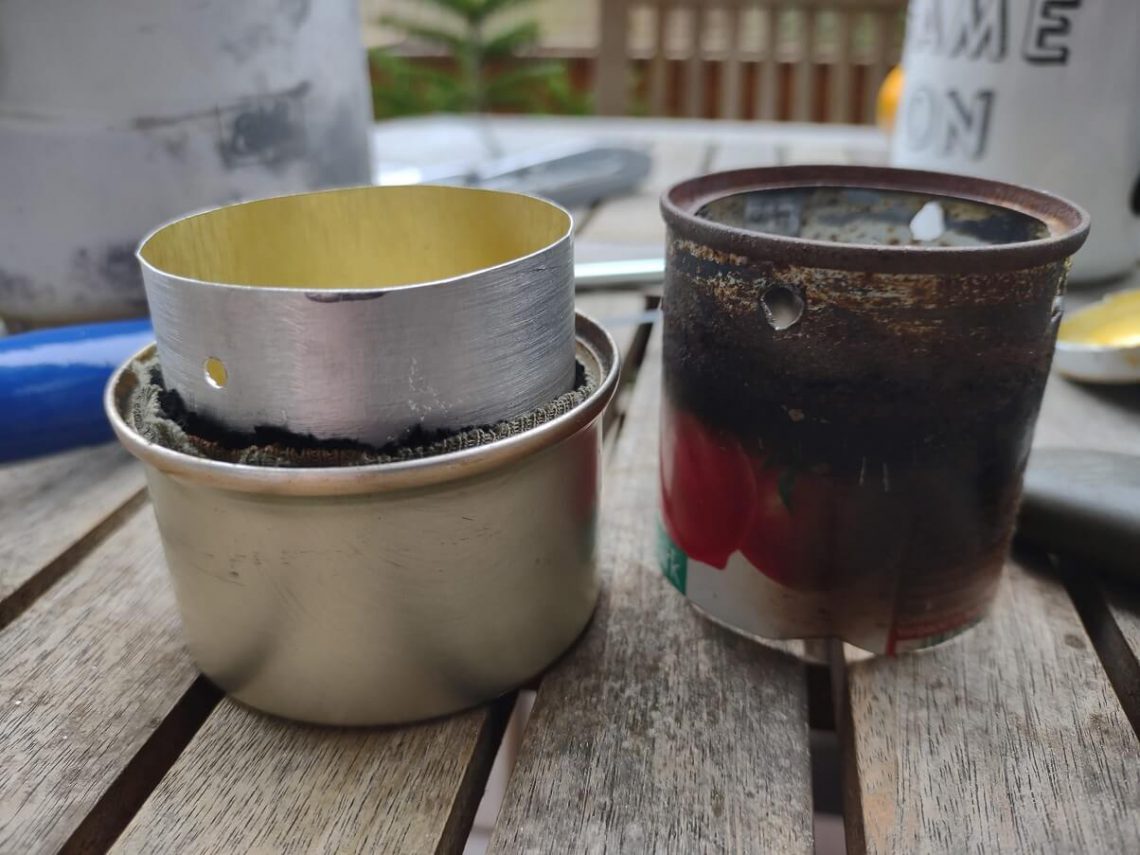
What my concern was with the original Fancy Feast stove using a tomato paste can, was the rust that builds up after prolonged use. Since it’s just steel typical of canned food, it will show signs of rust at some point. Due to being exposed to the heat from the flames and liquid from the fuel. This will take some time to do any harm to the integrity of the stove, but does not look nice, the steel is relatively heavy, and therefore there was some room for improvement.
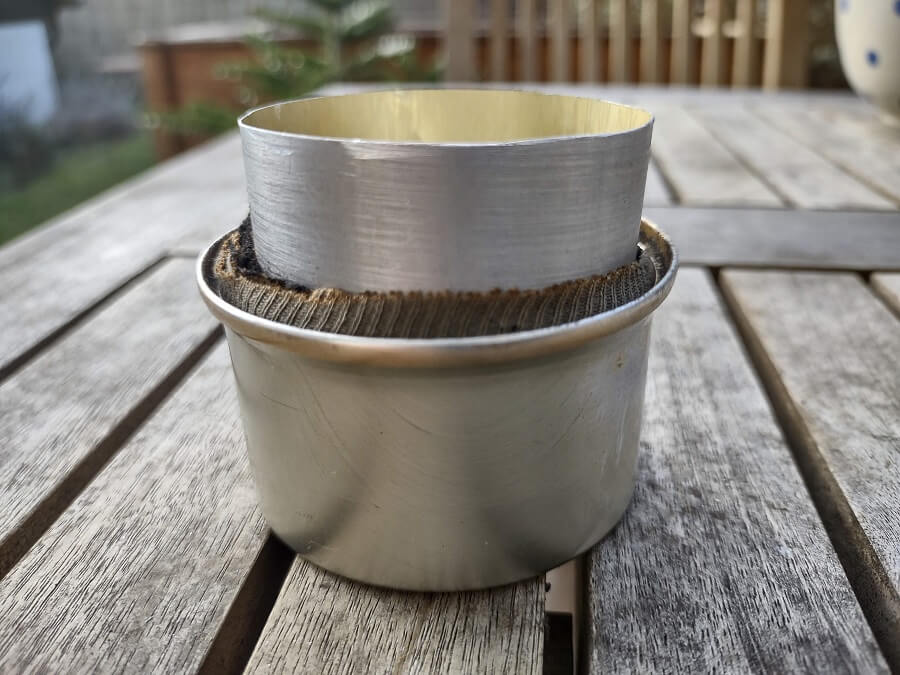
Enter the Rituals Shower gel can!
My wife used it up and it ended up in our recycling, and I thought that would be a good fit for the Fancy Feast stove. And as it turned out, it was the exact diameter as the tomato paste can. It’s made out of a thicker aluminum than your standard soda can, and can be easily worked without power tools. Since I have almost none, that was a requirement in my book. In earlier tests, I tried the same with a Red Bull soda can, however, this was way too flimsy to be a solid replacement for the tomato paste can.
Tools and requirements
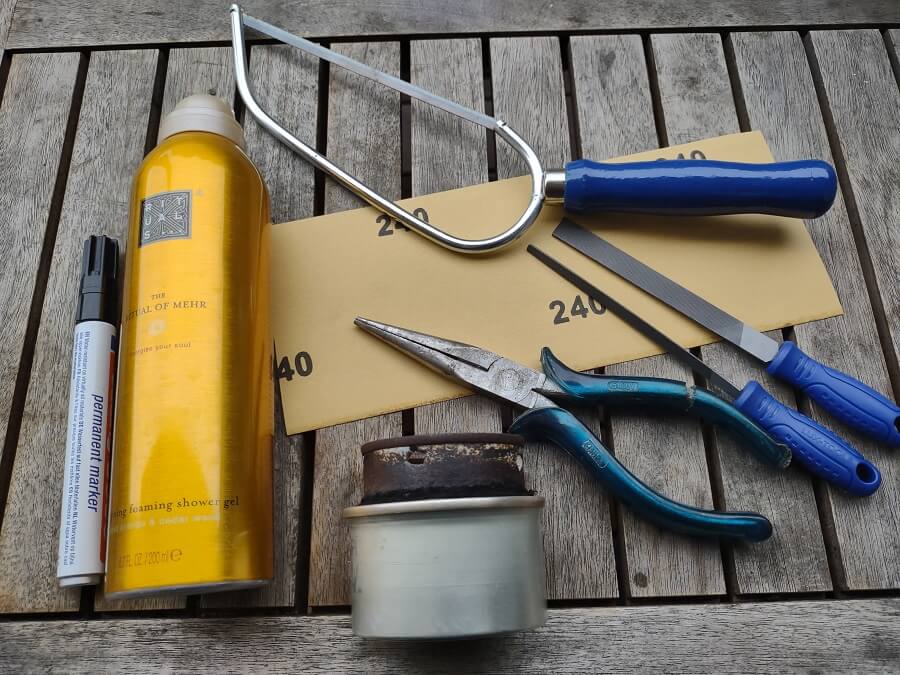
I ended up having to expand my toolbox a bit for this project, but that was not difficult due to the size of mine. Due to living in apartments for the last few years, and leaving my home country where I had quite the tool chest, my tools were limited. The stuff you will need to get this project done is the following:
- small hacksaw for metal
- sandpaper (240 grid or higher)
- set of small files for the detailed work (Rat tail, flat and triangle)
- sturdy knife
- marker
- ruler
For the stove itself you will need the following:
- Cat food can (Fancy Feast in the US. Gourmet in Europe)
- Wicking material
- Rituals shower gel can
As discussed in my original article on the Fancy Feast stove, there are multiple options for the wicking material used. I am still sticking with one of my old ripped-up 100% cotton t-shirt, which is still good to use after many, many, uses. And can be easily replaced if it does turn up degrading too much.
Design and construction
The construction of the Fancy Feast stove is not rocket science, it does require you to work some tools and pay attention to what you are doing, to not injure yourself. When in doubt about your own abilities, then get a parent to make it with you, or somebody experienced in the use of the tools described.
Warning! Fully empty the can of Rituals first! Not only do you prevent a mess, but also possible injury. Furthermore, do this outside and with eye protection, and wear a mouth and nose cover while sanding and filing.
To start, with the Rituals can intact, sand it down to get rid of the paint or outside coating. This is not needed, but does clean it up nicely. This is easiest to do with the can intact still. You only need to sand the bottom half of the can, the upper part we do not use in this project.
After you can mark the lines that you want to cut, half a centimeter from the bottom, and another line 5.5 centimeters above the line that you just made. Up next is the finicky part that you have to pay attention to, go slow and try to make the cut lines as neatly as possible. This will save you work later. If you have an electric saw, you can also use it at this point.
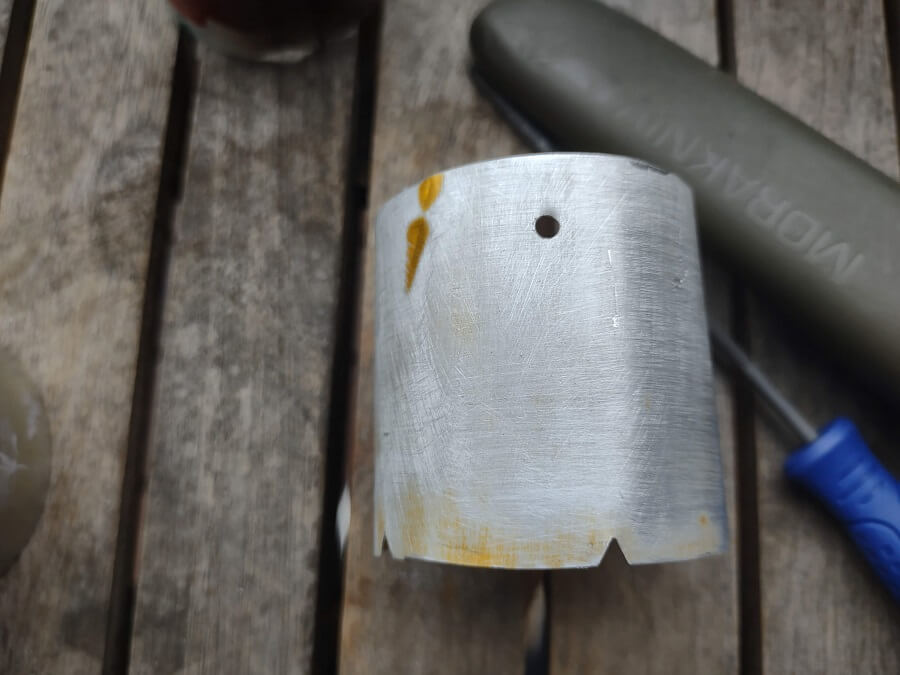
When cut, you can pick the nicest side and mark that as the top of the stove. This is where your pot will stand, and should be as straight and neat as you can get it. With the files, you can file it down and get rid of any burs with the sandpaper.
On the bottom of the stove, you need to make 4 flow channels, for the fuel to easily absorb into the wicking material, the triangle file can be used here. And should cut quickly through the soft aluminum. The position does not matter that much, just try to evenly space them apart throughout the bottom.
Last up, is to make a small hole with your knife in the top of the stove, 1 centimeter below the top. To allow for a vent hole. You can clean up the hole with the rat tail file to make it neater and without any sharp edges.
After completing these steps you can assemble the stove by wrapping your wicking material around the Rituals can part, and putting the whole thing inside the opened and cleaned Fancy Feast cat food can.
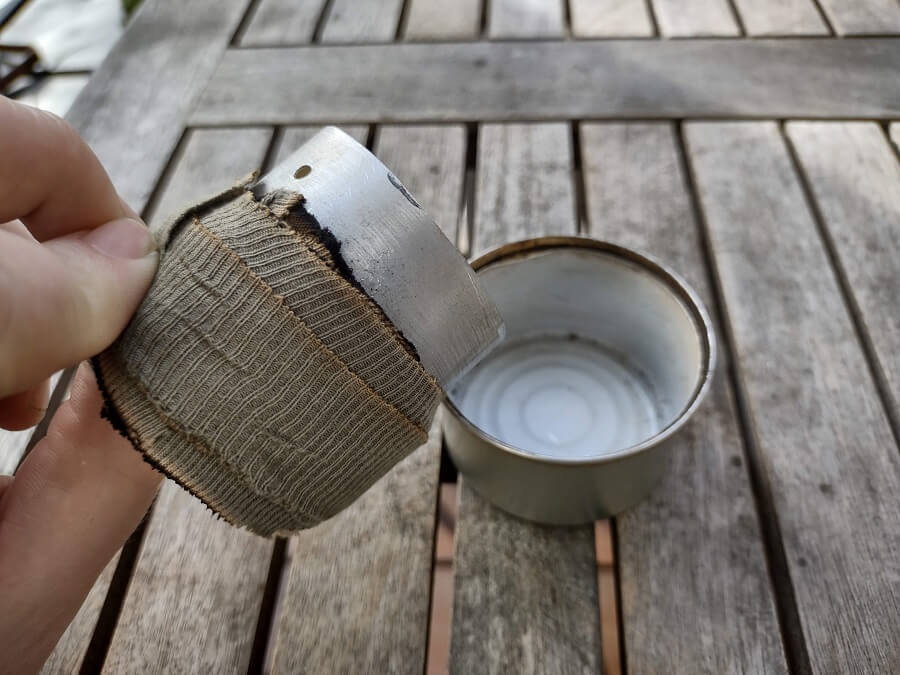
This requires a bit of cutting and adjusting the material. Multiple strips of the material can be used, or one thick one. Depending on your wicking material. Important is that it sticks out enough to easily light, but not too much. With your knife, you can also shimmy it back in if that’s the case, and adjust with testing.
Weight saved | No more Rust
The weight saved in comparison to the tomato paste Fancy Feast stove is huge! Relatively speaking of course, since it is a light alcohol stove. Compared down below are the weights using the same wicking material.
| Tomato Paste Fancy Feast stove (original) | 25 grams |
| Rituals shower gel Fancy Feast stove (improved) | 18 grams |
25% weight reduction, if only everything in your backpack was as cheap and easy to get down 25% in weight.
With Aluminium you do not have the same problems anymore with rust, since Aluminum only oxidizes without developing rust. And you save a bit of weight on the stove. A clear winner then in my book.
Boil times
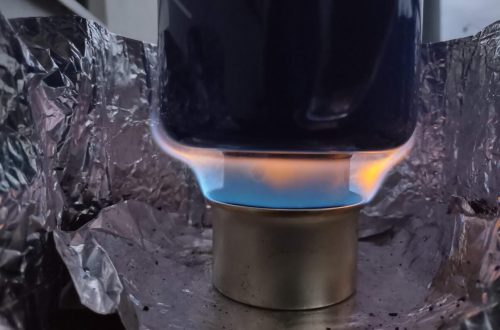
Boil times are about the same for the improved version in my testing, and are as always highly variable. On a cold and windy winter day, for 400 milliliters of water, it takes 7 minutes and 19 seconds to get to a roiling boil. With your stove, different wicks and fuel types results can vary. Alcohol stoves are not the fastest, but they don’t make the noise of a jet engine and will get the job done.
Possible further improvements
A rolled edge on the top of the stove would be a further improvement, not only will that look a bit nicer. But also can be a bit more stable to put your pot on. I thought and tried to use the bottom of the shower gel can for this purpose, but failed in making that work. If anyone has a way or technique that I am missing, feel free to let me know and everyone know down in the comments.
(Update Februari 2025)
With my latest design for the Fancy Feast Mark 3 as im calling it, the issues with this design has been addressed. And the design is way sturdier. Take a look at my latest article:
For all the instructions and changes in the design for the Fancy Feast alcohol stove.
I’m convinced the Fancy Feast stove is the option out there for everybody wanting to try out an alcohol stove. And is the least intimidating in use and construction. The Fancy Feast stove can be made by anyone and for basically free. With recycled materials and without the strict need for carbon felt wicking, the Fancy Feast stove can be a real alternative for any hiker.
Happy Hiking and Hike for Purpose!
Frank
I'm Frank, the main guy and owner of this website. Loves hiking, gear and bushcraft. And can get quite nerdy about them. In the woods several times a week preparing for my next hike. Always searching for another hill, which is quite difficult in the Netherlands. That's why I search around several countries. More about me on the about page.


2 Comments
John
Never tried this, but to roll the rim: I have some thin, but thicker than drinks cans, aluminum sheet/flashing in a roll. I think i could cut a piece, put a bend or roll in the rim, and attach the two sides into a cylinder with a couple of rivets. You inspire me to try!
Frank
Hey John,
Would love it if you share the results, you can contact me in the comments again or via email at info@hikeforpurpose.com.
Thanks for the comment!
Frank